
Loading...
Loading...
Loading...
Loading...
Loading...
Loading...
Loading...
Loading...
Loading...
Loading...
Loading...
Loading...
Loading...
Loading...
Loading...
Loading...
Loading...
Loading...
Loading...
Loading...
Loading...
Loading...
Loading...
Loading...
Loading...
Loading...
Loading...
Loading...
Loading...
Loading...
Loading...
Loading...
Loading...
Loading...
Loading...
Loading...
Loading...
Loading...
Loading...
Loading...
Loading...
Loading...
Loading...
Loading...
Loading...
Loading...
Loading...
Loading...
Loading...
Loading...
Loading...
Loading...
Loading...
Loading...
Loading...
Loading...
Loading...
Loading...
Loading...
Loading...
Loading...
Loading...
Loading...
Loading...
Loading...
Loading...
Loading...
Loading...
Loading...
Loading...
Loading...
Loading...
Loading...
Loading...
Loading...
Loading...
Loading...
Loading...
Loading...
Loading...
Loading...
Loading...
Loading...
Loading...
Loading...
Loading...
Loading...
Loading...
Loading...
Loading...
Times when Wise Option is open for support requests.
Regular Support Hours:
Monday to Friday: 8 AM to 5 PM Central Time
Special Hours:
Notices regarding any special hours (e.g., holidays) will be communicated:
Via email to the primary account holder.
Through a post on our Facebook Discussion Group.
Keep an eye on this page in the future, we will be putting details about new features here! Our Facebook Discussion Group also has lots of information about upcoming features for the year based on our end-of-year webinar 😄
Don'f forget about our List of New Features, which you can access through the Desktop app > Help > List of New Features!
Wise Option has several packages with specific features designed to help users acces features that best fit their needs.
Below you will find the list of our current packages with the features included in each. CLICK HERE TO VIEW ALL PACKAGES Should you have any questions or would like to activate a package, please contact us directly!
Need Help? Contact Us!
If you find yourself needing support, we're here for you through multiple channels:
eLearning Library & Resources: Our comprehensive online resources are available to help answer your questions at any time.
Online Help Request: Submit a help request or schedule a support session anytime through our website by navigating to WiseOption.com > Contact Us > Current User.
Email: For less urgent inquiries, reach out directly to your account manager via their email for personalized assistance. You can also email our general support team at .
Phone or Text: Dial or send a message to (214) 393-5522. Please be sure to include your name and business if this is the first time contacting us on our support line.
Don't hesitate to get in touch if you need help or wish to schedule a support session. Our team is dedicated to ensuring you have the best experience with our services.
What are Administrator Privileges? When granting users access to the system, Wise Option will automatically ask you if this user should be an Administrator. Administrators have additional access to critical features (i.e. Massive Invoice Cancellation and Tag creation). It is for this reason we recommend being very strict and limit the amount of users that have Administrator access. Who should have Administrator Privileges? As few individuals as possible. Only those who are trusted with critical features of the program. How do I know if someone is an Administrator? Go to Data > Professionals > Select their username from the list on the left. If they are an Administrator, they will have a red Administrator label next to their username. Can multiple people be Administrators? Yes, but it is our recommendation that you limit this privilege as much as possible. How do I make someone an Administrator? Go to Data > Professionals > Select their username from the list on the left > Click "Grant Access" at the bottom. Answer "Yes" to the first and second questions. How do I take away Administrator Privileges? If you would like to remove someone as an Administrator but keep them as a user with access to the system, follow the same steps above. Once you click "Grant Access" > Answer Yes to the first question and No to the second. If you click on another user and click back on their name, you will notice the red Administrator label is gone from their profile.
It is important to keep your method of payment up to date to ensure there is no lapse in subscription and services. At this time, in order to provide the best services for our users, a credit card or ACH account is required to be on file for the recurring monthly subscription.
Wise Option will never ask for your credit card information over the phone, email, or text. The ONLY place you should provide credit card or ACH information is via your account portal using our PCI compliant system at www.WiseOption.com, as explained in the steps below.
In this docmuent we will review the steps to add or update your card on file.
It is important to keep your method of payment up to date to ensure there is no lapse in subscription and services.
If the default payment method on file has bee attempted for 3 days and failed, Wise Option will stop attempts and the user will need to log in and add a new payment method and pay the balance.
Wise Option will never ask for your credit card information over the phone, email, or text. The ONLY place you should provide credit card or ACH information is via your account portal using our PCI compliant system at www.WiseOption.com, as explained in the steps below.
In this docmuent we will review the steps to add or update your card on file.
Credit Allocations require users to allocate credits to charges and or invoices. Please note that EVERY credit must be allocated (payments made via credit card, checks, discounts made to accounts, etc.)
This tutorial will review who should use credit allocations and include a Table of Contents for all related tutorials.
Our aim is to ensure that your business experiences minimal disruption. Should you face any of the above scenarios, or similar critical issues, please do not hesitate to create an emergency support ticket following the outlined steps.
After-Hours Availability: Emergency support is accessible outside of regular business hours, though response times may be longer than during normal operating hours.
Criteria for Emergency Tickets: Tickets not meeting the emergency criteria will revert to normal priority and be addressed during standard support hours.
Our Commitment: Emergencies are taken with utmost seriousness at Wise Option. Upon verification of an emergency, all available team members will prioritize the issue to provide a resolution as swiftly as possible.
Go to our website: www.WiseOption.com
Click Contact Us > Support Wizard (https://www.wiseoption.com/i-need-help)
Select EMERGENCY > Fill out and Submit Form
Two Subscriptions: If a user has two subscriptions (licenses), there are NO connections between the two.
Branches:
Branches share the list of customers, patients, and task files.
Customer charges, credits, and invoices are entered on a per-branch basis. A customer can have a balance on one branch and not another.
Through eBilling portal, a customer can see their total balance for both branches. If using the PCI-compliant credit card integration, they can make a payment for each balance, and they only need to enter the credit card information once.
If using the PCI-compliant credit card integration for both branches, the user will need two merchant accounts so funds from each branch can be sent to the appropriate account.
User Permissions may be adjusted to block certain users from accessing certain Branches.
Unless otherwise set up, ALL users will have access to ALL Branches.
Users who have access to multiple branches may switch easily back and forth between each across the Desktop, Web, and Mobile Apps.
We recommend discussing package selection for Branches with one of our support team members, but yes, each Branch can have different packages.
One exception to this is the IMPACT package. If one Branch has IMPACT, ALL Branches must also have IMPACT.
When adding a Branch, users will pay the additional monthly subscription for each package of the new Branch (including Foundation) and the associated Implementation Fee(s).
Terminal Seats are SHARED across all branches. You do NOT need separate Terminal seats.
If you have questions about Branches, please reach out to your Account Manager or our support team directly at [email protected].
Terminal seats determine the number of access points to the desktop application (i.e. 2 terminal seats mean 2 separate devices can be actively connected to the desktop application simultaneously.)
IMPORTANT: This does NOT limit the number of users in Wise Option or the number of devices set up to connect to the Desktop Application.
YES. You can have that terminal set up on as many devices as you'd like, but you can only have 1 active connection per terminal.
For Example:
If a business has 2 Terminals seats, but 3 devices they would like to access the desktop application from (a personal laptop, work computer, and an iPad Pro)
First, we recommend analyzing who will be accessing the application from each of these devices and when.
Personal Laptop: Julie - after hours, weekends, and sometimes when traveling for work
Work Computer: Julie - during business hours
iPad Pro: Technicians - during business hours.
Because only Julie will be accessing the Personal Laptop or Work Computer (either or, not concurrently), she could put Terminal 1 on both these devices as they will not be used at the same time.
They could then put Terminal 2 on the iPad Pro so the Technicians could use it while Julie uses the Work Computer or her Personal Laptop.
If you would like to increase or decrease the number of Terminal Seats, please contact us.
Please keep in mind that doing so will overwrite any settings that the user had previously. For this reason, we typically recommend doing this for new users that have not started using the program.
There is NO undo option once completed, so please be very careful when using.
Before beginning, make sure you have:
Access to the Desktop Application
Access to www.WiseOption.com account
Access to primary account email
Click the tabs below based on the version of the Wise Option software you need instructions on.
Video Coming Soon
Navigate to Data > Professionals
Select the user that you would like to use as the SOURCE (i.e. the user who has the settings that you would like to clone to others)
Click Clone User Preferences
Select the user(s) that you would like to overwrite their settings.
Submit
This feature is not relevant or present on the Web App version of Wise Option.
This feature is not relevant or present on the mobile application version of Wise Option.
IMPACT
Estimated Time to Complete – 5 to 15 minutes
If you have not already, please review the Credit Allocation Overview before proceeding.
We recommend activating Credit Allocations during a non-busy time, as this action may cause a temporary decrease in system performance and may take up to 15 minutes.
Click the tabs below based on the version of the Wise Option software you need instructions on.
Because this feature increases the administrative work to be done each day (average 5 additional hours per week per practice), we recommend enabling this feature in the following situations.
Your business does commission based on paid invoices.
Your business uses the Invoice Custom Field feature and would like to view the Accounts Receivable Report based on that Custom Field.
Your business uses Profit Centers and would like to determine the amount collected by Profit Center.
The business wishes to use the Escrow Account feature.
There may be other situations that may warrant Credit Allocations. Please reach out to your Account Manager or our support team if you are considering enabling this feature for a reason not listed above.
There are two options with Credit Allocations:
Manual Allocation
Auto Allocation
Users who wish to manually select invoices paid for each credit may wish to leave on manual allocations.
Not using Auto Allocation will increase the amount of administrative work and require extra diligence in reviewing unallocated payments.
Click the tabs below based on the version of the Wise Option software you need instructions on.
For visual learners or those who prefer step-by-step guidance, we offer a concise instructional video below.
Video Coming Soon
Navigate to the customer file for which you would like to return this transaction.
If the business uses Credit Allocations, please ensure the payment has been deallocated before proceeding.
Open the Customer Account > Payment with Digital Wallet > Credit transactions.
Set the date range to incorporate the transaction > refresh.
This feature is not relevant or present on the Web App version of Wise Option.
This feature is not relevant or present on the mobile application version of Wise Option.
Before beginning, make sure you have:
Login information for www.WiseOption.com account portal
Visit www.WiseOption.com > Login
Enter your account credentials (Hint: this is NOT the same as your login inforamtion to the software)
If you do not remember your password, click "Forgot Password"
If you do not rememeber your account email, please contact Wise Option Support
Using the left side menu, navigate to "My Account"
Under Default "Reply To" Settings > Click Update Settings
Enter the name of the person managing those emails on the left and their email on the right.
Insemination Reply To: For users with the Equine Breeders package, this controls which email should recieve responses from the Insemination Feedback emails. If your business does not use the Equine Breeders package, you can skip this
eBilling Reply To: This sets the default email that responses to eBills sent to customers should go to. Please note that users can change this email when they are sending eBills.
Account Statement Send To: This sets the default email that should receive copies of invoices for your Wise Option Subscription
Once completed, please click Submit
If you have not already, please contact Payment Innovators to set up your merchat account for ACH processing. Please email Glenn Witt at [email protected].
If you are unsure if you have done this, please do not hesitate to reach out to him.
Log in to your management portal at www.WiseOption.com
Navigate to My Account and click "Initiate ACH Payment Integration Service"
Review Terms and Condition, accept, and continue.
Wise Option Support will be notified of your request to activate the ACH Payment Integration.
Your account manager will confirm with Payment Innovators that your merchant account has been completed for ACH processing.
Once confirmed, Wise Option support will contact you to confirm that the merchant account is set up and integration is ready for use.
Before beginning, make sure you have:
Login information for www.WiseOption.com account
Visit www.WiseOption.com > Login
Enter your account credentials (Hint: this is NOT the same as your login inforamtion to the software)
If you do not remember your password, click "Forgot Password"
If you do not rememeber your account email, please contact Wise Option Support
Using the left side menu, navigate to "My Account"
To Add or Update a Credit Card on File:
Click "Update Credit Card Information"
To add a new card on file, click "Add Card"
If there are multiple cards on file, please mark the appropriate one as the Default. Please note that the Default will be the card charged each month
To Add or Update Bank Account Information for ACH Payments:
Click "Update Bank Account Information"
Click "Add Bank Account"
If there are multiple accounts on file, please mark the appropriate one as the Default. Please note that the Default will be the account charged each month
Be sure to mark if you would like the credit card or bank account (ACH) to be the default payment method for the monthly subscription.
If there is an outstanding balance on the account, please be sure to click "Pay Now"
Before beginning, make sure you have:
Login information for www.WiseOption.com account
Visit www.WiseOption.com > Login
Enter your account credentials (Hint: this is NOT the same as your login inforamtion to the software)
If you do not remember your password, click "Forgot Password"
If you do not rememeber your account email, please contact Wise Option Support
Using the left side menu, navigate to "My Account"
To view invoices, please Click "Account Statement - Billing History"
Adjust date range if needed
Click "View" to the right of the invoice line to view the invoice details
To Add or Update a Credit Card on File:
Scroll down to view the Digital Wallet and click "Edit Digital Wallet"
To add a new card on file, click "Add Card"
If there are multiple cards on file, please mark the appropriate one as the Default. Please note that the Default will be the card charged each month
To Add or Update Bank Account Information for ACH Payments:
Scroll down to view the Digital Wallet and click "Edit Digital Wallet"
Click "Add Bank Account"
If there are multiple accounts on file, please mark the appropriate one as the Default. Please note that the Default will be the account charged each month
Be sure to mark if you would like the credit card or bank account (ACH) to be the default payment method for the monthly subscription.
If there is an outstanding balance on the account, please be sure to click "Pay Now"
Before beginning, make sure you have:
Access to the Desktop Application
Access to www.WiseOption.com account
Access to primary account email
Click the tabs below based on the version of the Wise Option software you need instructions on.
STEP 1: Inactivate and Remove Access to the Username
Data > Professional > Select User > Uncheck "Is Active" > Save
Select User in list > Click Remove Access
STEP 2: Delete mobile app authorization code
Log in to > Tools > Authorized Mobiles > Delete the user's authorization code
For most users, the first 2 steps are sufficient. However, if this employee had access to more sensitive information and or left under bad circumstances, please follow the steps below, as well.
STEP 3 (OPTIONAL): Reset the password for ALL Wise Option users
Data > Professional > Select User > Click "Reset Password" > Repeat these steps for all users.
STEP 4 (OPTIONAL): If they had access to the primary email address that is used for the account, we recommend changing your password for that email.
STEP 5 (OPTIONAL): If they had the login credentials, make sure to reset the password.
Go to > Sign In > Enter username > Forgot my password > reset password through email link sent.
STEP 6 (OPTIONAL): If you have any concerns or they left under bad circumstances, we strongly suggest resetting the terminal credentials. Please contact Wise Option Support right away to initiate this process.
This feature is not relevant or present on the Web App version of Wise Option.
This feature is not relevant or present on the mobile application version of Wise Option.
Click the tabs below based on the version of the Wise Option software you need instructions on.
This feature is not relevant or present on the Web App version of Wise Option.
This feature is not relevant or present on the mobile application version of Wise Option.
Last Updated 8/7/2025
We are excited to announce the soft launch of Wise Option 7, the latest version of our software, which promises to enhance user experience with its innovative features and improved performance. This document summarizes the frequently asked questions we've received since the announcement, providing clarity and insights into what you can expect from Wise Option 7.
Make sure to watch our announcement webinar below to get the most comprehensive understanding of what this awesome news means to you and your facility.
Q: What is Wise Option 7 (WO7)? A: Wise Option 7 (WO7) is the latest version of our software, which is 100% web and mobile app-based.
WO7 will eventually feature all the functionalities of the desktop application, along with new features, moved to the web and mobile app.
It's designed to be lighter, faster, and more user-friendly. The best version of Wise Option yet!
The desktop app's original features (along with new ones) will be added to the web and mobile app (WO7). We are projecting all the desktop app features should be converted over to WO7 by 2026. Q: Why do you call it a soft launch? A: WO7 will be a solution that evolves as we work to bring all the desktop application features and new ones to the web/mobile app. We wanted to allow our users to use WO7 and WO6 simultaneously and completely switch to WO7 once all the features they use from the desktop are present on the web and mobile applications.
Q: When will WO7 be available to start using? A: WO7 is currently being utilized by Beta Testers. Please remember that not all the desktop features will be available on the web and mobile app at first. We estimate the completion of desktop feature conversion to be in 2026. This timeline is subject to change and, if updated, will be updated on this page.
Q: Is the desktop application going away? A: No, it will remain available until the end of 2026. However, we encourage users to use the WO7 web and mobile app to take advantage of new features and improvements!
Q: What are the benefits of using to WO7? A: WO7 offers several benefits, including:
Easier connection through any web browser on any device.
No need for Remote Desktop Connection setups.
Simplified file sharing.
Improved performance and faster updates.
Q: Will my data be migrated or lost? A: No, your data will remain intact. WO7 provides a new user interface with additional features but does not require data migration.
Q: Is my monthly subscription changing? A: Due to this upgrade, we are not anticipating any significant changes in monthly subscription costs at this time.
Q: When do we need to switch to WO7? A: You can use the desktop app (WO6) and WO7 simultaneously until 2026. We encourage you to transition gradually and provide feedback.
Q: Will I need to learn the software again? A: The structure and navigation will remain similar. We have made intuitive updates for better proficiency and provided a visually appealing facelift.
Q: Do I need faster internet to use WO7? A: No, WO7 is designed to deliver a better experience with your current internet connection.
Q: What technical improvements does WO7 offer? A: WO7 eliminates the need for Remote Desktop Connections, complex file sharing, and memory flushes. It provides automatic updates upon refresh, improving overall performance and user experience.
Q: Why is this transition necessary? A: The transition to WO7 simplifies processes, eliminates unnecessary connection steps, resolves local connection issues, and unlocks features that are only possible through the web app.
We hope this FAQ has addressed your questions. For additional support, don't hesitate to get in touch with our support team.
If you have a question you do not see answered here, please use the submit feedback button in the top right of this page to provide the question for our team to update this document with.
This document will review setting up Desktop and/or Mobile/ Web App Permissions for users, which will block them from certain actions or forms.
When creating a new user, by default, they can do or go almost anywhere in the application.
Click the tabs below based on the version of the Wise Option software you need instructions on.
Tax rules in Wise Option allow users to create rules for sales tax that apply to certain tasks.
For example, perhaps in the area of your business, you are required to pay sales tax on all dispensed items at a rate of 6.25%
Tax rules in Wise Option allow you to create this rule and apply it to the Task Files that it should apply to.
This feature offers flexibility, allowing users to assign different tax rules to various files.
It is important to note that tax does not show until the time of billing (procedures are on an invoice), however it is assessed at the time of procedure entry.
Tax rules are not mandatory in Wise Option, but serve as a feature available in every subscription.
Before beginning, make sure you have:
Logged into your Wise Option account.
Necessary user permissions to access Tax Rules.
Click the tabs below based on the version of the Wise Option software you need instructions on.
This feature is not relevant or present on the Web App version of Wise Option.
This feature is not relevant or present on the mobile application version of Wise Option.
This tutorial will review how to initiate an ACH transaction via the Wise Option application.
Please remember that ACH transactions can take up to 4 business days to settle.
Once a payment is initiated, Wise Option automatically checks daily for confirmation from financial institutions.
The credit will automatically be posted on the customer account and be marked as On Hold.
It will not be eligible to apply towards the customer balance until the payment has been confirmed settled.
If the user has set up Convenience Fees for ACH transactions, the charge for the fee will not post to the customer account until the payment is confirmed settled.
If the payment fails or is declined, the fee is not posted.
Completed Transactions may be flagged as:
Settlement Confirmed: The transaction was successful and funds have been transferred.
Failed: The transaction has failed.
Declined/Denied: The transaction has been denied.
Declined/Denied and Failed transactions are outside of Wise Option's control and are often caused by invalid accounts. account closures, or insufficient funds.
Estimated Time to Complete – 10 Minutes
Click the tabs below based on the version of the Wise Option software you need instructions on.
This tutorial will review the settings necessary to review once the ACH transactions are activated. The settings reviewed will include: Default Payment Method and Category, Allocation Settings for transactions made by customers on the eBilling portal, and Convenience Fees for ACH transactions.
Users do not have to charge customers a Convenience Fee for ACH transactions, although some may choose to in order to conver the small processing fee billed to them (the business). By default, there are no Convenience Fees charged to customers.
Estimated Time to Complete – 10 Minutes
Click the tabs below based on the version of the Wise Option software you need instructions on.
Each customer will have their own Billing Options that manage things like whether they want eBills or paper statements, preferred payment methods, etc.
Wise Option allows users to set the default billing options that you would like to apply to new customers added.
It is important to note that updating these Billing Options will not automatically update all customers in Wise Option, only those added from this point on.
Estimated Time - 5 minutes
Before beginning, make sure you have:
Logged into your Wise Option account.
Necessary user permissions to access Setting Default Customer Billing Options.
Click the tabs below based on the version of the Wise Option software you need instructions on.
In the pages on the left, you will find eLearning videos and descriptions about many of the available features in Wise Option.
Wise Option is a dynamic system, and we are always adding new features and making adjustments, so we will work to keep this updated as these changes occur.
We encourage you to use the "Submit Feedback" button to give us any feedback you have on this library. This includes when you notice a document may need improvement, or that you notice an answer was not available.
The web application is one of the three applications in which Wise Option users can access their data. The tutorial below reviews how to get started.
Please note that not all features available in the desktop application are available in the web and mobile applications yet.
This URL is unique to YOUR business (i.e. another WO user from another business could NOT use yours to log in to their database).
If you would like to “Bookmark’ this site in your browser, make sure you edit the bookmark and copy the URL exactly how is when provided. When the browser loads the page, it alters the URL. Editing the bookmark with this URL will ensure it uses the original URL.
Another option is to create a button on your website with this URL. Please note, if you place this URL on a public website and someone clicks the button they will not be able to access the data without the username and password. If this is a route you would like to take, we recommend all users evaluate their password strength (i.e. add characters, numbers, capital letters, make sure your username and password are not the same, etc.).
Overview
This tutorial will review how to activate the auto-allocation feature when using the Credit Allocation feature.
Auto-allocation is a feature that automatically applies credits to invoices (oldest invoice first) in certain situations. This can make using allocations easier for those who do not need to control how each credit is applied.
Every person logging into Wise Option should have a unique username and password. This is imparative to maintain security and accuracy of event logs. There is NO LIMIT to the number of users in the system.
The instructions below will review the steps to add a new user to the system and grant access for that user to log in.
Estimated Time to Complete – 10 minutes
You may remove old cards
You may remove old caccount information
Navigate to the customer file for which you would like to run this transaction.
Open the Customer Account > Payment with Digital Wallet.
Select the Bank Account from which you would like to request the transaction from.
Review the amount at the bottom right corner and the convenience fee (if applicable).
Click Pay Now
This feature is not relevant or present on the Web App version of Wise Option.
This feature is not relevant or present on the mobile application version of Wise Option.
Support Ticket Send To: This is the default email that any support tickets (Subscription changes, additional packages, etc) created for your account will be delivered to.
eBilling Payment Receipt To: Default email which copies of payment receipts are sent to when a customer makes a payment online via our PCI complaint credit card integration.
Customer Profile Update To: the email which will receive notifications when a customer updates any information (contact info, credit card, etc) on their client portal.
Custom Field - Online Invoice Review Comments Sent To: The email which will receive notifications when a reviewer leaves a comment on an invoice. This is only applicable for businesses that untilze the Invoice Custom Field feature. If you do not use this feature, you may ignore this.
Appointment Reply To: the email that will receive responses from customers that reply to email calendar appointment notifications.

You may remove old cards
You may remove old caccount information


This section holds the table of contents for all tutorials surrounding Desktop App Navigation and settings. Please see below for guidance. This section is strongly recommended for ALL new employees that will be using the Desktop App
Click the view icon at the end of the transaction line > Return.
If the business charges customers ACH Convenience Fees, please review the account and remove the original fee if desired. Wise Option does NOT automatically remove the fee.
The credit will be On Hold until the return settles.
Enhanced user interface and overall experience.
New features
Go to Main Screen > Professional > Desktop Permission
Add a new group.
Permissions are applied on a group level, not a per-user level, so you must create a group.
Name the group and select the check box for all practices if this will affect all practices.
Some users have multiple branches and may wish separate permissions based on the branch (practice).
If you do not have multiple branches, please check this box.
Select the group from the list, use the drop-down menu to select the user, and click Add User to add them to the selected group.
Users can be added to multiple groups.
Please note that only users who are not administrators will be available to add to groups
If a user is part of two groups:
Select the group > Select Practice or All Practices
Review all the areas to block and select the appropriate areas. By checking a selection box, you block a group from interacting with those specific actions or forms.
Example:
With the selections above, this group cannot click the Add Customer button on a customer file, Add Patient button from a customer file, open the account from a customer file, or access Billing Options from a customer file.
Click Save.
Test the permissions by having one of the users in the list login, and ensure you have blocked all necessary areas.
Main screen > Professional > Mobile Permission.
Repeat steps 2-9.
This feature is not relevant or present on the Web App version of Wise Option.
This feature is not relevant or present on the mobile application version of Wise Option.
Tools > Options > eBilling
Review the Category and Method assigned for ACH Transactions
If Credit Allocations are activated, please review the options for Auto Allocation
Save
Tools > Options > Default Values
ACH Transaction Convenience Fee is set to 0% by default. If you would like a to charge a convenience fee to your customers for ACH transactions, please adjust the % here.
Additionally, please review the text that will show in the Account Statement for these fees.
Save
This feature is not relevant or present on the Web App version of Wise Option.
This feature is not relevant or present on the mobile application version of Wise Option.
Log in to your Wise Option account.
Navigate to the "Settings" section in the main menu.
Select "Billing Options" from the dropdown menu.
Review the available billing options, such as eBills, paper statements, and preferred payment methods.
Set the default billing options that you would like to apply to new customers added to Wise Option.
Save the changes to the default billing options.
Note that updating these Billing Options will not automatically update all customers in Wise Option, only those added from this point on.
Contact our support team directly at if you encounter issues during setup or configuration.
This feature is not relevant or present on the Web App version of Wise Option.
This feature is not relevant or present on the mobile application version of Wise Option.
Click the tabs below based on the version of the Wise Option software you need instructions on.
Video Coming Soon!
Navigate to a customer file
Click on the customer account
Click "Credit" at the bottom left
Either select "Method" or "Categroy" (depending on which field you are needing to add values to)
Select one of the current values in the list and select the Add button (green plus)
Select the approprate relationship of the new value, Code, and Description
Relationship:
About Structure:
Methods and Categories can have three relationships to each other: Parent, child, or sibling.
Save
This feature is not relevant or present on the Web App version of Wise Option.
This feature is not relevant or present on the mobile application version of Wise Option.
Estimated Time to Complete – 10 minutes
Before beginning, make sure you have:
Your business's unique web app URL
If you do not have your unique web app URL, please email [email protected].
Click the tabs below based on the version of the Wise Option software you need instructions on.
For visual learners or those who prefer step-by-step guidance, we offer a concise instructional video below.
Please copy and paste the URL to your desired web browser.
Click Home > Member log in.
Log in with your Professional username and password (the one you created in the desktop application).
Save the URL as a bookmark. Edit the bookmark and copy the URL exactly how is it above. When the browser loads the page, it alters the URL. Editing the bookmark with this URL will ensure it uses the original URL.
Example:
IMPACT
Estimated Time to Complete – 15 minutes
Before beginning:
Credit Allocation must be activated
Click the tabs below based on the version of the Wise Option software you need instructions on.
For visual learners or those who prefer step-by-step guidance, we offer a concise instructional video below. Video Coming Soon
There are three auto-allocation settings to consider. Users can activate one and not the other or all. Please review both and decide which options should be activated.
Auto Allocation for manual credits and payments made via the digital wallet
This feature can be activated by checking the box Auto Allocation at the top right of any customer account
Please note that this activates for ALL customers and ALL users
If activated, this will ensure any manual credit added or credit card payment made via the digital wallet is allocated automatically.
Confirmation message for auto-allocation of digital wallet payments
This feature can be activated on a per-user basis and allows the user to receive a message when processing payments via the digital wallet asking whether or not they would like to auto-allocate this payment.
To activate this feature, the user can go to the Payment with Digital Wallet, select the settings option at the bottom left corner, and make the selection shown below
Auto Allocation of full and or partial balance credit card payments made via the customer portal
This feature can be activated by navigating to Tools > Options > eBilling and selecting Auto Allocate Credit Card Payments for full payment and or Auto Allocate Credit Card Payments for partial payment.
Auto Allocation of full and or partial balance ACH payments made via the customer portal
This feature can be activated by navigating to Tools > Options > eBilling and selecting Auto Allocate ACH Payments for full payment and or Auto Allocate ACH Payments for partial payment.
Please note that this activates for ALL customers and ALL users
Click the tabs below based on the version of the Wise Option software you need instructions on.
For visual learners or those who prefer step-by-step guidance, we offer a concise instructional video below.
Video Coming Soon
Navigate to the customer file for which you would like to add the Bank Account information for.
Open the Digital Wallet > Click the Add button at the bottom right corner.
Select the correct Merchant Account.
Review and update the address if needed
This feature is not relevant or present on the Web App version of Wise Option.
This feature is not relevant or present on the mobile application version of Wise Option.
Before beginning, make sure you have:
Logged into your Wise Option account.
Necessary user permissions to access Adding Company Logo.
Company logo is a JPG format
Click the tabs below based on the version of the Wise Option software you need instructions on.
For visual learners or those who prefer step-by-step guidance, we offer a concise instructional video below.
Adding your logo will ensure your logo is on printed statements, eBilling portal, and certain reports.
Open your logo on your computer.
To check the pixel size, click the three dots at the top right.
Select Resize > Custom Dimensions.
If the height is larger than 250 pixels or the width is larger than 300 pixels, change the height and or width and save a copy.
This feature is not relevant or present on the mobile application version of Wise Option.
This feature is not relevant or present on the mobile application version of Wise Option.
Before beginning, make sure you have:
An email address for each user.
HISA Integration Users:
ALL users must have their HISA Person ID entered in order to log in.
You can either enter the number when logging in for the first time, or the person creating the username can enter the number on the user profile after creation.
When entering the HISA person ID, please include the P and omit all dashes.
Example: If the person ID is P-000-000-000, you would enter P000000000)
Once submitted, the information for that person in HISA will be displayed.
Please confirm the correct person before submitting.
Click the tabs below based on the version of the Wise Option software you need instructions on.
For visual learners or those who prefer step-by-step guidance, we offer a concise instructional video below.
Add Professional Field options, i.e. administrative, accounting, veterinary, etc., or select one from the list
To add new: Click the label “Professional Field (Area)” > Green plus > Enter Title (description not required) > Save > close pop up. Created options will now be in the drop-down list to select
Add Professional Type option or select from option in list (veterinarian, technician, etc.)
To add new: Click the label “Professional Type” > Green Plus (+) > Enter Title (description not required) > Save > close pop-up. Created options will now be in the drop-down list to select
Once required selections are made, click save
Create all users
This feature is not relevant or present on the Web App version of Wise Option.
This feature is not relevant or present on the mobile application version of Wise Option.
This tutorial reviews common reasons why users have trouble logging in to the mobile app.
If you have not already, please review the mobile app setup tutorial first.
Estimated Time to Complete – 10 minutes
Before beginning, make sure you have:
Watched the mobile app setup tutorial
Mobile app is already downloaded on device
Username Created and Access Granted: A system administrator must have created you a username and granted your profile access to the system. Your profile must also be marked as Active and not expired.
Valid Authorization Code: Each device must have a valid authorization code. If you deleted and reinstalled the app or got a new device, you will need a new authorization code. Please contact your system administrator. You can check if you have entered an authorization code on the device by navigating to Authorization Code and scrolling down.
Latest Version of the App: Check your app store to see if there is an update pending. If there is, please update and try again. Updating the mobile app will not require a new authorization code
Message: Authentication Failed - Please enter a correct password. Note that password is case sensitive.
Reason(s):
Password typed in is incorrect. Please note, it is case sensitive.
Suggested steps:
Review your username and password and ensure it is entered correctly (case sensitive)
If after 2 more attempts, you still receive the same message, please contact your system administrator to ensure your user profile is active and possibly reset your password.
Message: Authentication Failed - User not found!
Reason(s):
Username typed in is incorrect. Please note, it is case sensitive.
User does not exist or is inactive/no access granted/expired
Suggested steps:
Review your username and ensure it is entered correctly (case sensitive)
If after 2 more attemps, you still receive the same message, please contact your system administrator to ensure your user profile is active and possibly reset your password.
Message: Authentication Failed - Authorization Code 'XXXXXX' is expired on "DATE" Please contact your system administrator.
Reason(s):
Authorization Code has expired
Suggested steps:
Contact your system administrator to edit the expiration date of the authorization code or delete the expired one create a new one.
If they delete the expired one, please ensure you delete the expired code from your Auth Code list before entering the new one.
Message: Authentication Failed - Authorization Code invalid!
Reason(s):
Authorization Code entered does not exist
There is no Authorization Code present in the Authorization Code list on your device's mobile app
Suggested steps:
Navigate to the Authorization Code section of the mobile app
If there is no code in the list, contact your system administrator to create a new one and then enter it on your app
If there is a code present, delete the authorization code from your Auth Code list on the app
Contact your system administrator to create a new one and then enter it on your app
Close the app completely (swipe up) and reopen. If still unable to login and message provided (if any) does not match those above, please continue.
If another user is able to login to the mobile app on their device, try to login with your user credentials.
If you are successful on their device but still unable to login on yours, continue with the steps below
If you are unsuccessul on their device, please review the message provided, and follow the steps above.
Users will now have the option to offer ACH as an integrated, encrypted, and secure payment method for their clients. This page will review the benefits, workflow of the integration, and associated costs.
What are the benefits?
Users can add banking information to the customer's digital wallet in Wise Option
Users can initiate ACH transactions with the customer's digital wallet
Once processed, the transaction will automatically be posted to the customer account
Clients can add banking information via the eBilling portal and initiate ACH transactions
Users will have the option to add a convenience fee for ACH transactions that would be charged to the client
A return of a completed ACH transaction can be initiated via the Wise Option application. Once returned, the transaction will be automatically posted to the customer account
What does the process look like?
ACH details are entered (via the client on the eBilling portal or user via the Customer Digital Wallet)
ACH transaction is initiated (via the client on the eBilling portal or user via the Customer Digital Wallet)
The transaction is enter the Status "Pending Settlement"
Wise Option automatically checks daily for confirmation from financial institutions
Can I return or void ACH transactions?
Users cannot void ACH transactions.
However, users can return (partial or full) successful ACH transactions (Status: Settlement Confirmed).
The transaction is enter the Status "Pending Return"
Wise Option automatically checks daily for confirmation from financial institutions.
It typically takes between 2 to 4 business days for transactions to be confirmed.
Returned Transactions may be flagged as:
Return Settled: The transaction was successful and funds have been transferred.
Return Failed: The transaction has failed.
I would like to offer ACH as a payment option for my customers. How do I get started? Users will have to sign up for a merchant account with Payment Innovators first. Please contact Glenn Witt with Payment Innovators at [email protected].
Once the merchant account is created, users will be able to activate this service via the account management portal (WiseOption.com).
For complete step by step instructions, please click here:
Is there a cost associated with ACH transactions?
Yes. These fees are charged to the business (not your clients).
There is a transaction fee per transaction which is billed by the merchant service.
There is a Convenience Fee that is billed by Wise Option for transaction management.
The Convenience Fee is assessed by a percentage of the monthly total of confirmed transactions and confirmed returns. Convenience Fees are NOT charged on failed or incomplete transactions. The percentage (rate) is determined based on the monthly total of confirmed transactions and confirmed returns. The table below outlines the ACH Rate based on monthly transaction totals.
Can I cancel the ACH service?
Yes. Users may deactivate the ACH service anytime via the Wise Option portal (WiseOption.com)
Transactions already confirmed prior to deactivation are still billed.
ACH Account Cancellation Policy
Final ACH report is generated 10 days after account cancellation.
Charges are processed 5 days later.
No data extracts or closure documentation are released until all balances are paid.
The desktop application is one of the three applications in which Wise Option users can access their data. The tutorial below reviews how to get started.
Please note that not all features available in the desktop application are available in the web and mobile applications. Follow the instructions below to learn how to set up the Wise Option desktop application on your compatible device. Users can set up the desktop app themselves or have one of our network technicians do this for them.
Estimated Time to Complete – 10 minutes
Before beginning:
If you would like our network technician to set this up for you, please see the resources at the bottom of this page.
If you would like to set up the desktop app yourself, you will need the server credentials for the terminal.
If you do not have these, please see the resources at bottom of the page.
Click the tabs below based on the device type you need instructions on.
Click Here to Contact Wise Option Network Support for help.
In this tutorial we will review how to set up price rules in Wise Option.
Estimated Time to Complete – 10 minutes
Before beginning, make sure you have:
Logged into your Wise Option account.
Necessary user permissions to access Price Rules.
Click the tabs below based on the version of the Wise Option software you need instructions on.
In this Wise Option tutorial, we learn to create tax rules, customizing criteria like branch, invoice type, and country, and assigning tax percentage and type, ensuring accurate invoicing based on specific conditions.
Estimated Time to Complete – 10 Minutes
Before beginning, make sure you have:
Logged into your Wise Option account.
Necessary user permissions to access Task Files.
Click the tabs below based on the version of the Wise Option software you need instructions on.
8.25% City Sales Tax (Percentage After)
8.25% City Sales Tax (Percentage After) -only for dispensed invoices
2% State Tax (Percentage After)
Cost and Price Rules allow users to create markup rules for task files, which is used in combination with the Inventory package, allows users to massively update the cost and price of their task files based on their purchase history.
Estimated Time to Complete – 10 Minutes
Before beginning, make sure you have:
Logged into your Wise Option account.
Click the tabs below based on the version of the Wise Option software you need instructions on.
This feature is not relevant or present on the Web App version of Wise Option.
This feature is not relevant or present on the mobile application version of Wise Option.
This folder is where you save documents downloaded from the desktop application. This will also be the folder where you save images and documents that you would like to upload into the desktop application.
You must do this on each device you have the desktop application on.
Estimated Time to Complete – 5 Minutes
Before beginning, make sure you have:
Logged into your Wise Option account.
Necessary user permissions to access Creating a folder for the Desktop App.
Click the tabs below based on the version of the Wise Option software you need instructions on.
This document reviews our recommendations and requirments for internet connect while using Wise Option.
The most important thing that will directly impact your experience with Wise Option is a stable internet connection.
Recommended minimum speed: 5mbps upload and 5mbps download per connected user and 50ms or less latency (or ping). As long as the connection is stable and does not fall below 3mbps upload and 3mbps download per connected user, the performance should not be impacted.
Required minimum speed: 1.5mbps upload and 1.5mbps download per connected user and 100ms or less latency (or ping)
Although Wise Option will work with this speed, performance will be impacted.
You can run an internet speed test using
This tutorial will review what to do in the case your Desktop app has become frozen and you are not able to click anywhere.
Please follow the steps below to restart the application:
If this occurs again within the same day or the steps above do not work, please contact Wise Option support: Please sumbit under a regular request and not an emergency.
Profit Centers allow businesses to break down their work into groups. Profit Centers were designed to aid in the separation of charges within one business to see revenue generated from each Profit Center. In this tutorial we will explore who should use profit centers and how to add them. Who are Profit Centers for? Example: A business does work that can be divided between the groups "Hospital" and "Reproduction". That business may decide to create two Profit Centers. They may also be used to separate locations of work. Example: A business does work in two states, California and Nevada, but is one business entity (i.e. 1 tax EIN) They can set up a Profit Center for each.
In this tutorial we will review how to get started with Wise Option Web Boards. Web Boards allow users to display certain forms in Wise Option on certain devices. This allows information to be viewable by users in places where quick reference information is needed. Some examples include:
Displaying the Calendar in the treatment area so users can see upcoming appointments and changes to the schedule.
Favorite Tabs allow users to have Wise Option automatically open certain tabs when you log on.
This can help speed up getting started in the morning and also help when first learning Wise Option, so you don't have to keep opening all the tabs you want to work in every day.
In this tutorial we will review how to set up Favorite Tabs. Estimated Time to Complete – 5 minutes
This tutorial will review what to do in the case of a this specific message on the home screen of the Desktop app.
This message does NOT indicate a sever issue and should not impact your use of the program.
This message can occur when are performing server updates, but rest assured that your data is safe, accessible, and saving. You may continue to use Wise Option.
If this message has not gone away within 30 minutes, please follow the instructions below.
In this tutorial, we will review what to check when you cannot view some buttons on a form, things look cut off, or icons that were previously present are missing.
Most of the time, this is a screen resolution issue. Please review our hardware requirements page for screen resolution, scale requirements, and recommendations.
This is often a simple fix: adjust your device's display settings to meet Wise Option requirements.
That being said, some devices are limited in their screen resolution and may not be able to meet Wise Option's requirements. In this case, some users continue to use the device, as they can still perform the functions in Wise Option they need. However, you may need to consider changing devices if you cannot.
These are NORMAL processes of Wise Option desktop application. Please see below for more information and tips when encountering memory flushes.
As Wise Option desktop app runs, it accrues "Cache Memory". This is a temporary memory that helps it run faster. However, if it occurs too much, then it gets slower. There are processes to auto-clear the cache memory called memory flushes. Many of these are designed to occur without you noticing.
However, during times of prolonged and high-volume data entry, it does not have this opportunity. It will then present the warning message, stating that the cache is getting high and that performance may be affected. This allows you to either perform the memory flush to clear the cache or delay this, triggering a reminder within a certain amount of time.
We highly recommend you perform a
In this tutorial, we will review the Unbilled Procedures Report, its purpose, how to view it, and how to use it.
This report views all miscellaneous procedures that are not on an invoice yet.
This is most helpful for users at the end of the month to review the miscellaneous procedures that will be billed during the massive creation of miscellaneous invoices.
We recommend that all users who create massive invoices at the end of the month use this report to ensure the accuracy of billed procedures.
Making adjustments before procedures are placed on invoices is much easier.
Review the Account Holder Name and Account Nickname
Select if the account is a checking account or savings account.
Save
Ensure your device is running on the latest software version. If the operating system of the device is very far behind this can cause issues running the app. Please check for updates and perform any provided. Try to login again. If unable to login, pleasd continue
Delete the mobile app from the device and ask system admin for a new authorization code. Redownload the mobile app, enter the new authorization code and login. If after this you are unable to login on the device, please contact Wise Option Support for assistance.
"1.1 - N/A" and "100 - Adjustment" are siblings.
"200 - Credit Card" is the parent of "201 - Visa".
"301 - Domestic Check" is the child of "300 - Check".
"301 - Domestic Check" and "302 - Travel Check" are siblings


In Group 1, they can add credit cards, but they are also part of Group 2, which has that ability blocked.
This pairing means they will not be able to add credit cards.
Suppose these are the only selections made for this group. In that case, the users in this group may still perform actions on the customer file that are not listed specifically (i.e. add or edit contact information).
Please review all areas when setting permissions for the first time. Some areas may appear multiple times as there are multiple ways to get to that area. For example, in this case, there is an Add Patient button on the patient file. Since it is only blocked from the customer file, a user in this group could add a patient from the patient file.


Remember, this will only impact new customers added from this point on. If you would like to change the Billing Options for customers already entered, you will need to massively update the settings via the Customer Massive Update tool*
*If you do not have IMPACT package, please contact Wise Option support and we can assist with this one time update.


It typically takes between 2 to 4 business days for transactions to be confirmed
Transactions may be flagged as
Settlement Confirmed: The transaction was successful and funds have been transferred.
Failed: The transaction has failed.
Declined/Denied: The transaction has been denied.
Declined/Denied and Failed transactions are outside of Wise Option's control and are often caused by invalid accounts. account closures, or insufficient funds.
An invoice will be sent by Wise Option on the 10th of each month with the total completed ACH transactions for the previous month, the ACH Rate, and total Convenience Fee.
The invoice is sent via email and users have 5 days to dispute any charges.
The default payment method on file will be automatically charged on the 15th.
No refunds are provided after billing is completed. ACH Progressive Discount Table
$300,000.01
$400,000.00
0.78
$400,000.01
$500,000.00
0.75
$500,000.01
None
0.70
$o.oo
$100,000.00
1.0
$100,000.01
$150,000.00
0.94
$150,000.01
$200,000.00
0.87
$200,000.01
$300,000.00
0.83
The Profit Center is determined when the procedure is entered or the reminder is set as done. The user sets it and must change it when they want to enter charges under a different profit center.
Because of this, using Profit Centers requires the commitment and dedication of all users to ensure accurate entry.
Profit Centers can be used as criteria for commission, cost and price rules, and much more.
Example: Commission may be set to 10% of gross profit under the Profit Center Hospital, but 15% when an item is entered under the Profit Center Training.
If utilizing Credit Allocation, users can also determine amount collected by Profit Center.
Users may also set separate prices for an item based on the Profit Center. If you have questions about Profit Centers, please reach out to your Account Manager or our support team directly at [email protected].
Estimated Time to Complete – 5 Minutes
Log in to the desktop application.
Tools > Data > Profit Center.
Select one in the list.
Click the green plus button.
Select the appropriate option: Parent, Sibling, Child.
Enter Code and Description.
Save.
If you wish to have this new Profit Center to have the same pricing as the others, you will need to go to Tools > Data > Massive Update Management > Retail Cost & Price Massive Update > Cop Retail Cost/Price
Apply Profit Centers to existing procedures or reminders when creating or editing them.
Change the Profit Center assignment whenever necessary to correctly attribute charges to the appropriate Profit Center.
Encourage all users to commit to accurate Profit Center assignments to maintain data integrity.
Explore various ways Profit Centers can enhance your business operations, such as commission structures, pricing models, and cost analysis.
Monitor revenue generated from each Profit Center to identify areas for improvement and growth opportunities.
Consider implementing Credit Allocation alongside Profit Centers to further analyze financial performance based on collected revenue by Profit Center.
Refer to the Wise Option documentation or contact our support team directly at if you encounter issues during setup or configuration.
This feature is not relevant or present on the Web App version of Wise Option.
This feature is not relevant or present on the mobile application version of Wise Option.
For users with the Equine Breeders Package, they can display the Daily Worksheet in the stocks, so users walking by can see how the day is progressing.
List of current forms in Wise Option which have Web Board capabilities:
You will be able to see that the form has Web Board capabilities as there will be an Authorization Code at the top right of the form.
Calendar
Location Map
Daily Worksheet (Requires Equine Breeders Package)
Courier Log (Requires Equine Breeders Package)
Semen Order Log (Requires Equine Breeders Package)
Hardware/Software Requirements:
Compatible web browser*:
Google Chrome
Edge
Safari
Firefox
Google Chromecast- Browser TV Web
Amazon Firestick Web Browser
*There may be other web browsers that are compatible, however these are some of the ones we have recently tested *Bowser compatibility is subject to change. As an ever advancing software company, we are dedicated to using the latest technology available. This can sometimes lead to incompatibility with some of web browsers as they may not support the latest software technologies.
2. A device which can run a compatible browser
Tips for use:
Portrait versus Landscape Orientation: Not all devices and browsers are capable of switching to Portrait mode. Although we do not have any specific recommendations (as we personally have not tested this) for this, some users reported being able to achieve this with a portrait mode capable device and a mini computer.
Careful placement: Be sure to consider the information that will be displayed and the individuals who should see it. Example, the calendar web board may display client names and patient names. You may not want to display this in areas clients have access to.
Estimated Time to Complete – 20 minutes
Before beginning, make sure you have:
Logged into your Wise Option account.
Necessary user permissions to access Web Boards.
Click the tabs below based on the version of the Wise Option software you need instructions on.
For visual learners or those who prefer step-by-step guidance, we offer a concise instructional video below.
Go to the form that you with to use on a Web Board
Note the Authorization Code (usually located at the top right corner, if there is one available for that form)
This code will be valid indefinitely or until a user clicks the green plus next to the code on the form.
Go to the device with the compatible web browser and go to www.WiseOption.com
Click Login > Authorization code
Many users wish to bookmark this page for easy access later, please do so at THIS step and before entering the authorization code
Enter the authorization code and click Validate
Go to the settings icon and adjust the form specific settings to ensure the appropriate text size and desired layout on the device
We recommend first adjusting text size, then Height and Width
These settings are saved until changed
This feature is not relevant or present on the Web App version of Wise Option.
This feature is not relevant or present on the mobile application version of Wise Option.
Click the tabs below based on the version of the Wise Option software you need instructions on.
For visual learners or those who prefer step-by-step guidance, we offer a concise instructional video below.
<Video Coming Soon>
With all the tabs you want open, right-click on one, top-level tab > Tab Transfer.
Select the professional(s) you would like to send the open tabs to > Transfer.
When that professional logs in, the tab transfer window will appear and they can select the tab transfer they would like to open.
If you would like to view your Tab Transfers or those sent to you, Main Screen > User Icon at top Right Corner > Tab Transfer.
This feature is not relevant or present on the mobile application version of Wise Option.
This feature is not relevant or present on the mobile application version of Wise Option.
If you receive this message for more than 30 minutes, please contact Wise Option support: https://www.wiseoption.com/i-need-help Please sumbit under a regular request and not an emergency.

Please copy and paste the URL to your desired web browser.
Enter your username and password
Review the login options
Last Opened Tabs: This will open all tabs previously opened on last login
Favorite Tabs: This will open the tabs the user has listed in their Favorite Tabs list
Fresh Login: No tabs will open.
Login
Save the URL as a bookmark. Edit the bookmark and copy the URL exactly how is it above. When the browser loads the page, it alters the URL. Editing the bookmark with this URL will ensure it uses the original URL.
Example:


This does NOT cover credit card payments made via the customer portal, which will remain unallocated until the user allocates them.
If activated, this will ensure credit card payments made via the digital wallet that is for the full and or partial account balance is allocated automatically.
If activated, this will ensure ACH payments made via the digital wallet for a full or partial account balance are allocated automatically.


Open the desktop application.
Tools > Options > Branch Properties.
Select your practice > edit (pencil icon).
Statement & Invoice Settings > Browse.
Select your folder and the logo image file.
Click Save > Ok > View.
If you would like to adjust the image to the left or right, or up or down, close the preview.
Enter values in the X value (left to right) and or the Y value (up and down).
We recommend moving in increments of 15 to start.
You can use negative values.
Click Save > View.
Continue adjusting until you like the placement.
Select first user in the list on the left
Click “Grant Access” and answer Yes to the first question
Only answer Yes to the second if the user is an Administrator
Users can now log in with the temporary password 1234. You will be prompted to change it upon login.
Open the Microsoft Remote Desktop Application.
Enter the computer name (this field is NOT case-sensitive).
Click Show Options > Display.
Review options here. We recommend the bar is set to "Large" and if you have multiple monitors, you may wish to select the option "Show on All Monitors."
Click General.
Enter Username provided.
Click Save As to save to your Desktop (we suggest naming it Wise Option Terminal # [fill in the number])
Click Connect > Enter Password
Your password should now be saved.
Please note, some local security systems do NOT allow the saving of passwords. In this case, you may have to contact your local IT Security company to enable or enter this password each time you log in
For visual learners or those who prefer step-by-step guidance, we offer a concise instructional video below.
Open or Download the Microsoft Remote Desktop Application
Add New PC
Enter PC name (computer name)
Click on the User drop down and select Add User Account > Enter Username and password > Add
Set expiration date if needed.
Create.
Go back to your mobile app and click the side menu bar > Authorization Code.
Enter the code created. Wise Option will automatically move your cursor from one square to the next and capitalize the letters.
Click Validate.
Log in with your Professional username and password (the one you created in the desktop application).
Keep an eye on this page in the future, we will be putting details about this feature here! Our Facebook Discussion Group is also a great place to get answers from fellow Wise Option Users.
Online Help Request: Submit a help request or schedule a support session anytime through our website here.
Email: For less urgent inquiries, reach out directly to your account manager via their email for personalized assistance. You can also email our general support team at [email protected].
Phone or Text: Dial or send a message to (214) 393-5522. Please be sure to include your name and business if this is your first time contacting us on our support line.
Don't hesitate to get in touch if you need help or wish to schedule a support session. Our team is dedicated to ensuring you have the best experience with our services.
Please help us improve our eLearning Library by submitting your feedback here.
This feature is not relevant or present on the Web App version of Wise Option.
Open the task file
Locate and select the "Task Rule" label.
Click on the green plus button to initiate the creation of a new tax rule.
Type in a title for your tax rule. Consider being specific, such as mentioning the state or type of tax (e.g., "Vermont State Tax").
Customize based on your requirements. For instance:
Choose a specific branch for which the tax rule applies.
Select an exception based on invoice type (e.g., dispensed invoices) (This requires IMPACT)
Consider scenarios like after hours versus regular hours (This requires IMPACT)
Set exceptions for profit centers or specific locations (This requires IMPACT)
Define criteria based on the customer's billing address country.
Select the appropriate tax type (e.g., state tax).
Choose between "Percentage Before" or "Percentage After" based on your country or state's tax rules.
Example of Percentage After:
If using "Percentage After," the tax is applied after the item cost is calculated.
For instance, if the item costs $10 with a 10% sales tax, the tax is $1, and the total invoice amount is $11.
Example of Percentage Before:
If using "Percentage Before," the tax is applied before calculating the item cost.
For example, if the item costs $10 with a 10% sales tax, the tax is $1, and the total invoice amount is $10.
Save and Review:
Save your tax rule settings.
Review your created tax rule.
Repeat or Modify as Needed:
If necessary, create additional tax rules or modify existing ones based on different criteria.
Further Learning:
Explore additional videos for more examples of tax rules.
This feature is not relevant or present on the Web App version of Wise Option.
This feature is not relevant or present on the mobile application version of Wise Option.
Before logging into the desktop application, go to your file finder on the computer
Open your Windows C (sometimes abbreviated "OS: C) drive
Create a new folder here (suggested name: a-Wise Option Docs)
Right-click on the folder and create a shortcut on the desktop of your computer
Now open the desktop application
Open the file finder in the cloud
Click on “This PC” on the left
Click on “C on (Computer name)”
You will see the folder you created
Right-click on the folder and select Pin to Quick Access
IMPACT
Inventory
Estimated Time to Complete – 10 minutes
Before beginning, make sure you have:
Logged into your Wise Option account.
Necessary user permissions to access Cost Rules.
Click the tabs below based on the version of the Wise Option software you need instructions on.
For visual learners or those who prefer step-by-step guidance, we offer a concise instructional video below.
Keep an eye on this page in the future, we will be putting details about this feature here! Our is also a great place to get answers from fellow Wise Option Users.
Online Help Request: Submit a help request or schedule a support session anytime through our website .
Email: For less urgent inquiries, reach out directly to your account manager via their email for personalized assistance. You can also email our general support team at .
Phone or Text: Dial or send a message to (214) 393-5522. Please be sure to include your name and business if this is your first time contacting us on our support line.
Don't hesitate to get in touch if you need help or wish to schedule a support session. Our team is dedicated to ensuring you have the best experience with our services.
Please help us improve our eLearning Library by submitting your .
This feature is not relevant or present on the Web App version of Wise Option.
If this occurs again within the same day or the steps above do not work, please contact Wise Option support: https://www.wiseoption.com/i-need-help Please sumbit under a regular request. This is only an Emergency if it is impacting all users.
Click the tabs below based on the version of the Wise Option software you need instructions on.
For visual learners or those who prefer step-by-step guidance, we offer a concise instructional video below.
Main Screen > Select User Icon in top right corner > Favorite Tabs.
Review the list of available tabs.
Select each tab one at a time and click Add
Users can reorder the tabs once selected, by using the up and down arrows to the right of the list,
We recommend having no more than four Favorite Tabs, as more may impact performance.
Save.
This feature is not relevant or present on the mobile application version of Wise Option.
This feature is not relevant or present on the mobile application version of Wise Option.
Estimated Time to Complete – 5 minutes
<Video Coming Soon>
For the instructions below, check the local device display settings, NOT in the RDP display settings (where the Desktop app is).
Windows/Microsoft Device
Open Settings > System > Display
Scroll down to Resolution
Ensure BOTH the screen resolution and scale are set to the required values
Apple Device
Open System Settings > Display
Ensure BOTH the screen resolution and scale are set to the required values
Some Mac computers do not display the exact resolution and scale depending on your device. If you have the option, try selecting the option for more compact or smaller text.
Click the tabs below based on the version of the Wise Option software you need instructions on.
<Video Coming Soon>
Navigate to Tools > Billing
Click Unbilled Procedures Review
To view on the computer, click Yes.
To print the report, click No
Viewing the Report on the Monitor:
We recommend reviewing the report options at the top left of the screen.
Click Patient with Unbilled Procedures to show only patients in the list that have unbilled procedures
Then, review the additional settings (such as date range considered, type of procedures) and click save
Printing the Report:
Some users prefer to view the paper report. This can be especially helpful if multiple users need to review it.
Review the print options and click submit
This feature is not relevant or present on the Web App version of Wise Option.
This feature is not relevant or present on the Web App version of Wise Option.
Smart Billing is a feature which allows users to send statements based on the last time the customer was sent a statement. This helps to ensure customers are not receiving them too frequently and allows users to send statements in an incremental manner at the end of the month instead of all at once. This is particularly beneficial for businesses which approve customer invoices.
Estimated Time to Complete – 5 Minutes
Click the tabs below based on the version of the Wise Option software you need instructions on.
Explore the power of Wise Option's List View Settings in this tutorial. Learn how to customize and optimize data displays, create unique configurations for each form, and efficiently manage settings. Discover the flexibility of multiple sort criteria and the time-saving benefit of cloning settings for seamless collaboration.
Almost all grid views in Wise Option are customizable so that you can change:
Columns displayed
Order of the columns
Column width
Order in which data is displayed
Because every form displays different information, List Settings are unique to each form.
List Settings are set on a per-user basis. However, users can easily clone settings from each other. Estimated Time to Complete – 10 minutes
Click the tabs below based on the version of the Wise Option software you need instructions on.
In this tutorial we will review the set up steps which should be completed before using the Equine Breeders Package.
Estimated Time to Complete – 10 minutes
Before beginning, make sure you have:
Logged into your Wise Option account.
Click the tabs below based on the version of the Wise Option software you need instructions on.
Queries are customizable searches that are available throughout Wise Option. Queries will search the system for records matching the search criteria. This can help users create customized lists and reports, while optimizing the data shown. In this tutorial we will review examples of Queries and how to create them.
Examples:
In Customer Management- creating a query for customers that have been marked as "Hold Bill".
In Patient Management- creating a query for patients with a specific tag or a job purpose (i.e. all active broodmares).
Estimated Time to Complete – 10 Minutes
Click the tabs below based on the version of the Wise Option software you need instructions on.
Alerts are messages users can set to pop up when a user opens the customer file. An example would be if a customer has an outstanding balance and has been sent to collections, a user would create an alert on the customer file to notify other users that this account has been sent to collections.
In this tutorial we will review how to create Customer Alerts.
Estimated Time to Complete – 10 Minutes
Click the tabs below based on the version of the Wise Option software you need instructions on.
In this section, you will be guided through the process of conducting massive updates to customer files efficiently. This feature enables modifications across various sections of customer files for all clients within your system simultaneously.
However, it's imperative to exercise caution while utilizing this tool due to its considerable impact as these changes are irreversible.
Click the tabs below based on the version of the Wise Option software you need instructions on.
This document goes over how to adjust an individual Customer File Billing Options.
Customer Billing Options allow users to mark preferences and settings on a per-customer basis, such as Paper vs. eBill preference, eligibility to be charged monthly late fees (APR), CC convenience fees, and more.
Estimated Time to Complete – 5 minutes
Click the tabs below based on the version of the Wise Option software you need instructions on.
This tutorial will review the Customer Profile Update URL feature and how to use it.
This feature empowers users to embed a secure URL on their facility website, facilitating clients to submit their information.
Upon submission, updates are flagged as pending until users review and approve them in the Pending Customer Profile Update form. The submitted information can be used to create new Customer Files or linked with existing files.
Estimated Time to Complete – 10 Minutes
Before beginning, make sure you have:
Obtained your unique Customer Profile Update URL from Wise Option support.
Click the tabs below based on the version of the Wise Option software you need instructions on.
This section explains how to search for invoices by invoice number in Wise Option in the case where a customer name was not given.
Estimated Time to Complete – 5 Minutes
Click the tabs below based on the version of the Wise Option software you need instructions on.
Printing a customer statement can be beneficial to see a total owed for a specific period, while viewing all tranactions (invoices, payments, adjustments) for the selected period.
When printing a customer statement, users have the option to print the invoices present in that period, or only the statement. This tutorial will review how to individually print a customer statement and invoices.
Estimated Time to Complete – 5 minutes
Click the tabs below based on the version of the Wise Option software you need instructions on.
This tutorial will review how to close the period.
Some users want to ensure that once billing is completed for a particular month or period, that users cannot make changes to closed invoices, credits, or charges posted within that period. This can help maintain accuracy of financial data.
This action only impacts closed account records (Invoices, charges, credits).
If you wish to close the period, users must do so manually after each period. Users typically do this after they complete end of month billing each month.
We highly encourage users to create restrictions in permissions for certain users to ensure that they are unable to re-open the period.
This tutorial will review what customer tags are, how to create them, and some of their possible uses.
Customer tags are like digital sticky notes that can be added or removed from customer files. They were designed to help organize and identify certain things about a customer quickly.
Tags are created by administrators but can be added or removed by any user.
Tags alone do not have a direct feature, but they can be used as variables in other features that can be quite powerful.
Example:
As a true cloud solution, Wise Option has 3 applications: Desktop, Web, and Mobile.
General Note Regarding Screen Size and Resolution:
Please keep in mind that although some devices may meet the requirements for the application, they may not meet the user’s preference.
Example: a 13’’ laptop with a resolution of 1920 x 1080 and Windows 10 may meet the requirements for the Desktop application. However, some users may find the application too small to work on with this screen size.
Merging Customer Records
We do not allow the deletion of patient or customer files in Wise Option, as this would cause issues with records and history. The most common reason users want to delete a customer file is duplication.
We give users the option to merge customer files. This will merge all billing history, account information, contact info, and patient ownership.
In this tutorial, we will review how to merge customer files.
Please be VERY careful with this tool. There is NO undo button.
Estimated Time to Complete – 5 minutes
This tutorial will review how to include custom messages on printed statements.
There are two options when printing custom messages on printed statements, Lines and Frame.
The Frame option is best used for standardized text for the business that will remain the same regardless of the location (i.e. printing individually from the customer account or massively under Tools > Billing). Text entered with this option will be the same for all users.
The Frame option also has the benefit of almost unlimited characters and custom font adjustments (highlighting, bold, italics, different font styles and sizes, etc.)
The Lines option is best used for short messages that the user wants customized per user and location.
Learn how to efficiently add customer files in this tutorial. The video covers initiating the process, filling required fields, and adding contact details like phone numbers and addresses.
Discover useful features such as applying masks for phone numbers and the Form Holder button for streamlined data entry. Perfect for those handling multiple customer entries, this tutorial ensures a smooth entry experience.
Estimated Time to Complete – 10 Minutes
This document explains how to use a report to view charges and credits on customer accounts in bulk rather than one at a time.
Example: You may want to review all service fees applied or cross-reference checks entered in the order they were inputted with the deposit report from the bank.
Our highly flexible report allows users to sort and review all charges and credits posted to accounts within a specified date range, while also providing easy editing capabilities for these records.
Estimated Time to Complete – 10 Minutes
Overview
This tutorial will review how to de-allocate a credit from an invoice or charge on a customer account.
To use this feature, you must have activated Credit Allocations.
If this does not resolve your original issue of being unable to view the entire form, please get in touch with Wise Option Support.
If this does not resolve your original issue of being unable to view the entire form, please get in touch with Wise Option Support.
Click on the space to the left of each patient's name to review the unbilled procedures for that patient.
Example: an 11’’ iPad Pro may meet the requirements for the Desktop application. However, some users may find the application too small to work on with this screen size or may not like to use the application on a tablet.
Software Requirements:
Windows 10 is still supported, but since support ends in October 2025, Windows 11 is recommended.
Or MacOS Monterey or higher
Minimum Hardware Requirements:
Screen Resolution: at least 1600 x 900*
Scale: 100%
*You can have a screen resolution as low as 1440 x 900, however there may be a few forms that do not have all the features available at this resolution.
Hardware Recommendations:
Recommended Maximum Resolution: 1920 x 1080
Recommended Minimum Screen Size: 16’’
Potentially Compatible Devices: Desktop computers, Laptops, Tablets
We recommend that users who wish to use a compatible tablet for the Desktop application also use a Bluetooth keyboard for a more optimal experience. We also recommend using the largest possible tablet with the desktop application
We do NOT recommend Chromebooks for the Desktop application.
Web App Requirements:
A device capable of running a mainstream web browser (Google Chrome, Microsoft Edge, Safari)
Mobile App Requirements:
Device must be capable of accessing the Apple App Store or the Google Play Store and
iOS Device at least running iOS 15.6
Android Device at least running Android 14
Estimated Time to Complete – 5 Minutes
Click the tabs below based on the version of the Wise Option software you need instructions on.
For visual learners or those who prefer step-by-step guidance, we offer a concise instructional video below. Video Coming Soon
Navigate to the customer account in which the payment and invoice are present
Ensure you are in Allocation View (if not, please click the allocation view button at the top right)
Click on Amount of the invoice, charge, or credit in which you would like to de-allocate
Review the individual allocation records for this entry
You can either remove an individual allocation record or all from this entry.
To remove multiple, check the selection box next to the appropriate record and click "Delete Allocation"
To remove all, click "Check All", then "Delete Allocation"
Review the account balance and ensure it is correct
This feature is not relevant or present on the Web App version of Wise Option.
This feature is not relevant or present on the mobile application version of Wise Option.
Customer File > Account
Adjust the start and end date for the appropriate period > Refresh
Click Print
Review Print Options
Submit
This feature is not relevant or present on the Web App version of Wise Option.
This feature is not relevant or present on the mobile application version of Wise Option.

Click Display > Review options here
Click > Devices and Audio > Review options here (Suggested > Select Printers and Clipboard)
Click Folders > Check option to Redirect Folders
Click grey plus to select folders on your local computer which you would like to have access to while in the Desktop application (i.e. to upload documents or saved reports from Wise Option)
Click Add
Please note, some local security systems do NOT allow saving of passwords. In this case, you may have to contact your local IT Security company to enable or enter this password each time you log in
Keep an eye on this page in the future, we will be putting details about this feature here! Our Facebook Discussion Group is also a great place to get answers from fellow Wise Option Users.
Online Help Request: Submit a help request or schedule a support session anytime through our website here.
Email: For less urgent inquiries, reach out directly to your account manager via their email for personalized assistance. You can also email our general support team at [email protected].
Phone or Text: Dial or send a message to (214) 393-5522. Please be sure to include your name and business if this is your first time contacting us on our support line.
Don't hesitate to get in touch if you need help or wish to schedule a support session. Our team is dedicated to ensuring you have the best experience with our services.
Please help us improve our eLearning Library by submitting your feedback here.
This feature is not relevant or present on the Web App version of Wise Option.
This feature is not relevant or present on the mobile application version of Wise Option.
Navigate to any form in Wise Option with a grid view present and List Setting (top right of the frame).
Click the List Settings icon.
Click the green plus (+) button in bottom left corner.
Give this new List Setting a Name.
Save.
Review the Available Fields column and individually select each field you would like to view in the grid and move to Selected Fields using adjustment button between the two columns.
Re-organize the list of Selected Fields with the up and down buttons to the right of the Selected Fields column. The order of the columns will mirror the list (Left > Right = Up > Down).
Determine how you would like to have the data in the grid sorted by moving values from the Selected Fields to Sort Criteria column. For each Sort Criteria, select Ascending or Descending option.
Save.
Users may decide to create multiple List Views for one form.
This feature is not relevant or present on the Web App version of Wise Option.
This feature is not relevant or present on the mobile application version of Wise Option.
Keep an eye on this page in the future, we will be putting details about this feature here! Our Facebook Discussion Group is also a great place to get answers from fellow Wise Option Users.
Online Help Request: Submit a help request or schedule a support session anytime through our website here.
Email: For less urgent inquiries, reach out directly to your account manager via their email for personalized assistance. You can also email our general support team at [email protected].
Phone or Text: Dial or send a message to (214) 393-5522. Please be sure to include your name and business if this is your first time contacting us on our support line.
Don't hesitate to get in touch if you need help or wish to schedule a support session. Our team is dedicated to ensuring you have the best experience with our services.
Please help us improve our eLearning Library by submitting your feedback here.
This feature is not relevant or present on the Web App version of Wise Option.
This feature is not relevant or present on the mobile application version of Wise Option.
Keep an eye on this page in the future, we will be putting details about this feature here! Our Facebook Discussion Group is also a great place to get answers from fellow Wise Option Users.
Online Help Request: Submit a help request or schedule a support session anytime through our website here.
Email: For less urgent inquiries, reach out directly to your account manager via their email for personalized assistance. You can also email our general support team at [email protected].
Phone or Text: Dial or send a message to (214) 393-5522. Please be sure to include your name and business if this is your first time contacting us on our support line.
Don't hesitate to get in touch if you need help or wish to schedule a support session. Our team is dedicated to ensuring you have the best experience with our services.
Please help us improve our eLearning Library by submitting your feedback here.
This feature is not relevant or present on the Web App version of Wise Option.
Open the Wise Option application and navigate to the Customer Management section.
Identify the customer for whom you want to create an alert.
Click on the "Alerts" option
If the customer doesn't have any existing alerts, you will see an empty list.
Enter a title for the alert in the provided field (e.g., "Payment Required").
Optionally, set an expiration date for the alert. If no expiration date is set, the alert will be permanent until and if manually deleted by a user.
Enter the alert message in the designated area (e.g., "Please contact billing department before servicing.").
Review the style icon that you would like associated with this alert.
Save the alert to apply the changes.
Upon saving, the alert will be visible when viewing that specific customer file.
Every time you access that customer's account, the alert will pop up with a warning, indicating the presence of an alert.
The alert will be attributed to the Wise Option user who created it.
This feature is not relevant or present on the Web App version of Wise Option.
This feature is not relevant or present on the mobile application version of Wise Option.
From Wise Option Home Screen > Tools > Data > Massive Update Management > Customer Massive Update.
A list of customers will populate on the screen.
This list can be organized by creating and selecting certain queries (top right) just like on the Customer File List. (ex. active only, customers with a certain billing option selected, etc)
Under 'Update', select the field on the Customer File that you would like to update.
Under 'To', select the option that you would like the field to be updated to.
EXAMPLE 1: Updating Customer's Billing Option to Charge APR (Checked)
b. EXAMPLE 2: Updating Customer's Billing Option to CC Partial Payments (Checked)
From the customer list created, check the boxes for the customers that you want updated. By checking the box on the column title line, you will check all boxes in this list.
When you are finished with your selections, click the save button (disk icon).
There will be two prompts asking for confirmation of this change as this can NOT be reversed after.
It is recommended to then check a couple of customers to make sure the change was made appropriately.
This feature is not relevant or present on the Web App version of Wise Option.
This feature is not relevant or present on the mobile application version of Wise Option.
Navigate to the Customer File.
Click on the label "Billing Options."
Make the necessary adjustments to preferences and settings.
Save changes.
This feature is not relevant or present on the Web App version of Wise Option.
This feature is not relevant or present on the mobile application version of Wise Option.
For the customer:
After clicking the provided link, enter your email address and click the submit button.
Check your email inbox for a verification link from Wise Option.
Click the link labeled “Click here to update your profile online.”
A new tab will open, prompting you to complete the required information.
To add a credit card, click the “add card” button and complete the necessary fields.
Click "Complete."
For the Wise Option user:
In the Wise Option application, the customer icon turns red and has a number to indicate the number of pending profile updates.
Click “Customer” and select “Pending Profile Update.”
You can choose to:
Add new customer file
Discard Pending Profile Updates
Link to an existing customer
If the customer’s information is not in the system, click Add New Customer.
If you already have the customer’s information, click Discard Pending Profile.
Click “Link to existing customers” to update customer information.
Reports > Reports for Invoices.
Use the queries drop-down to filter invoices.
You can create your own query based on specific criteria (ex. Invoices from the last 6 months)
Use the filter icon in the Invoice Number column to search for a specific invoice number.
Once the invoice is found, you can clear the filter and start a new search for a different invoice number.
You can directly access the customer account associated with a particular invoice.
This feature is not relevant or present on the Web App version of Wise Option.
This feature is not relevant or present on the mobile application version of Wise Option.
Click the tabs below based on the version of the Wise Option software you need instructions on.
<Video Coming Soon!>
Closing the Period
Navigate to Tools > Options
Ensure “Close Out Period on” is checked
Type the last day of the period you would like to close
If your billing period is the 1st to the end of the month, the date would be the last day of that previous month
Any account records (Invoices, charges, credits, posted on or prior to the date typed here will be unable to be altered while this option is selected.
Click Save
Re-Opening a Past Period
Navigate to Tools > Options
Uncheck “Close Out Period on”
Click Save
Go to the closed records that need changing.
The business created a tag for customers who must pay at the time of service. They named this tag "Pay at Time of Service."
They then applied this tag to several customer files.
Options (details about these options are below!):
Create a customer alert that automatically appears when a user opens this file and for all customers with this tag applied.
Create a query in the customer management form to pull a list of all customers with this tag applied
Create a task exception for customers with this tag applied
Create a query in the email blast form to send a custom email to all customers with this tag applied.
Estimated Time - 5 minutes
Before beginning, make sure you have:
Administrator access
Click the tabs below based on the version of the Wise Option software you need instructions on.
For visual learners or those who prefer step-by-step guidance, we offer a concise instructional video below.
Video Coming Soon!
Navigate to a customer file
Click the link Tags (above Sort ID)
To add a new tag, click the green plus icon at the bottom right.
Name the tag by adding a Title
Click the tabs below based on the version of the Wise Option software you need instructions on.
For visual learners or those who prefer step-by-step guidance, we offer a concise instructional video below.
Go to the customer files you wish to merge and write down their account numbers.
Tools > Data > Merge > Customer Merge.
Click Source and search for the customer file that is the duplicate > Confirm the account number > Save.
Make sure you are searching by the Sort ID. This list is formatted to show Customer Sort ID / Account Number.
Click Destination and search for the customer file that is the original > Confirm the account number > Save.
Double-check you have selected the correct files.
Merge.
Answer confirmation questions.
Review any conflicting fields and select which should remain.
Submit.
This feature is not relevant or present on the Web App version of Wise Option.
This feature is not relevant or present on the mobile application version of Wise Option.
Estimated Time to Complete – 10 minutes
Click the tabs below based on the version of the Wise Option software you need instructions on.
<Video Coming Soon!>
Using the "Frame" Option
Navigate to any customer file > Account
Click Print
Ensure the option "Lines" is selected and "Print Messages on Statement" is selected
Click Edit
On the left side, type the text you would like to show on the statement
You can use the controls at the top of the form to adjust text size, style, and color.
Click Preview in the center of the form to view the text on an example statement.
Once the changes are made, click Save
Click Print to review and memorize the settings selection.
Using the "Lines" Option
Navigate to the location where text is needed. If it is when individually printing customer statements, go to a customer account. If it is when massively printing statements, go to Tools > Options > Billing > Statements > Print.
Once in the necessary location, click Print
Ensure the option "Lines" is selected and "Print Messages on Statement" is selected
The packages below are required in addition to the Foundation package. If you have questions about this please contact your account manager.
IMPACT
Estimated Time to Complete – 5 Minutes
Click the tabs below based on the version of the Wise Option software you need instructions on.
For visual learners or those who prefer step-by-step guidance, we offer a concise instructional video below. Video Coming Soon
Two ways to begin
Invoice/Charge and Payment are Already Posted
Navigate to the customer account in which the payment and invoice are present (invoice must be closed and payment posted)
Ensure you are in Allocation View (if not, please click the allocation view button at the top right)
Click on the button at the bottom "Allocate Credit"
This feature is not relevant or present on the Web App version of Wise Option.
This feature is not relevant or present on the mobile application version of Wise Option.
Click the tabs below based on the version of the Wise Option software you need instructions on.
For visual learners or those who prefer step-by-step guidance, we offer a concise instructional video below.
Main screen > Customer > Customer File.
Add New Customer.
The only required field is a Business Name or Owner Name.
If entering a phone number: select a description (required) > enter the number > select the mask “USA” if entering a US based number > check box “Apply Mask” (this will memorize for next time).
If entering multiple numbers, click “Add More”.
The phone number entered will save and the fields will clear for you to enter another.
If entering an email: Type a custom description (examples: main, accountant, Susan) and enter the email.
If entering multiple, click “Add More”.
The entry will save, and the fields will clear for you to enter another.
If entering an address: select a title (required) > Enter address.
If entering multiple, click “Add More”.
The entry will save, and the fields will clear for you to enter another.
If adding multiple customers, check the Form Holder box next to the save button before clicking Save. This will save the first customer file and then clear the form for you to add the next.
Repeat steps 3-7 until you are on your last customer. When you have entered your last customer, uncheck the Form Holder box and click Save.
A list of all the customers created will be opened in a new tab.
This feature is not relevant or present on the Web App version of Wise Option.
This feature is not relevant or present on the mobile application version of Wise Option.
Click the tabs below based on the version of the Wise Option software you need instructions on.
For visual learners or those who prefer step-by-step guidance, we offer a concise instructional video below.
This report allows you to see a detailed record of all financial transactions on a customer account that are not invoiced. This includes:
Charges other than invoices
Credit entries made on the customer account
Using the Report
Navigate to Reports > Acc. Trans. Other Than Invoices
Select Date Range: Specify the date range you want to view transactions for.
Filter Transactions (Optional):
Choose to view "Charges," "Credits," or "Both."
This feature is not relevant or present on the Web App version of Wise Option.
This feature is not relevant or present on the mobile application version of Wise Option.
This tutorial will review how massively send eBills and print statements.
This is commonly done at the end of each month.
Some users may only send eBills, printed statements, or send a combination based on client preferences.
Estimated Time to Complete – 10 minutes
Click the tabs below based on the version of the Wise Option software you need instructions on.
There may be several scenarios in which a user needs to adjust a credit or charge entry directly to the customer account.
Examples: A check payment was registered, but the incorrect date or amount was entered.
The steps below will review how to make these entries.
If the period has been closed, a message will appear when you try to make an adjustment, blocking you from proceeding. Please contact your administrator to open the period to make the adjustment.
Please note that you will not be able to edit this entry if it was made automatically via the PCI-Compliant Credit Card integration.
There is a separate tutorial that reviews adjusting invoices.
Estimated Time to Complete – 5 minutes
Click the tabs below based on the version of the Wise Option software you need instructions on.
There may be several scenarios which a user may need to add a credit or charge entry directly to the customer account.
Examples: a balance transfer from a previous system, payment OTHER than the PCI-Compliant CC Integration, such as a check, cash, or electronic transfer platform, or account adjustment.
The steps below will review how to make these entries.
Estimated Time to Complete – 5 minutes
Click the tabs below based on the version of the Wise Option software you need instructions on.
Right-Click / Secondary-Click
Right-clicking with an Apple device can have different controls depending on the device. Apple refers to right-clicks as "secondary click". In this lesson, we cover how to right-click with:
iPads
iPads with Bluetooth keyboard +/- mouse
Macs with a Trackpad
Macs with a Mouse
Try the following:
Click and hold your finger on the spot you would like to "right-click" on.
Try the following:
Click and hold the Control key + click on the correct area with your mouse or trackpad.
Two-finger trackpad tap or click
Enable Right-Click in Settings
Try the following:
Click and hold the Control key + click on the correct area with your trackpad.
Set up a gesture for your trackpad to right-click
Apple Menu > System Preferences > Trackpad
Try the following:
Click and hold the Control key + click on the correct area with your trackpad.
Set up a gesture for your Mouse to right-click
Apple Menu > System Preferences > Mouse
In this tutorial, we will review how to cancel an invoice.
Canceling an invoice will ensure it can never be closed and will be out of the list of pending invoices. This is our way of deleting invoices.
This process cannot be undone, so please be careful!
Estimated Time to Complete – 10 minutes
Mastering the Desktop App navigation takes time and practice. When learning any new item, we recommend practicing in one area and making that the goal for the day/week. Users who master these navigation tips see a significant improvement in performance and speed, and a decrease in the number of clicks throughout the day.
Estimated Time to Complete – 30 minutes
In this tutorial we will review how to adjust your search settings. This can be very beneficial when you feel as though the results of a search are too wide (too many results) or narrow (too few or no results).
Because every form displays different information, search settings are unique to each form.
Search settings are set on a per-form and per-user basis. Estimated Time to Complete – 10 minutes
This tutorial will review how to bill (create an invoice and close this invoice) for a patient with miscellaneous procedures that have been added to their patient file.
Please note that this will not catch procedures already on an invoice, inpatient record, or contract record.
Estimated Time to Complete – 10 minutes
Save
The tag is not ready for us and can be applied to this customer or any customer file by navigating back to Tags > Check the box to the left of the tag you wish to apply.
A customer may have multiple tags applied.
Navigate to a customer file
Click the link Tags (above Sort ID)
To add a new tag, click the green plus icon at the bottom right.
Name the tag by adding a Title
You can also choose a color for this tag (stongly recommended), by clicking Back Color and selecting a color on the wheel.
Save
The tag is not ready for us and can be applied to this customer or any customer file by navigating back to Tags > Check the box to the left of the tag you wish to apply.
A customer may have multiple tags applied.
Choose General
If you have a trackpad, select Trackpad. If you have a mouse as well, select Trackpad & Mouse
Enable the option Two-Finger Secondary Click
You will now be able to perform a two-finger trackpad tap or click when you would like to right-click.
Mouse right-click
Open Settings
Choose General
Select Trackpad & Mouse
Select which mouse button you would like to perform the right-click (secondary click)


Type the text in Message 1, 2, and or 3. You do not have to enter text in all 3 lines.
Ensure you click "Print" after typing the text so you can review the text and save the changes/updated text.
If you make any adjustments to the text, you must click Print to save the changes.
These settings are saved on a per location and per user basis.
If the changes were made from the Customer Account form, any Customer Account that user visits will remain with these settings.


Here you can review and apply credits to particular invoices or charges. Continue on Step 3.
During Credit/Payment Entry. Continue on Step 3.
Wise Option will auto-select the invoices and credits available (oldest first) for a suggested allocation.
If this is not correct, you can click "Unselect All" above the credits to unselect them and reselect the credit you would like to apply the invoice(s).
In the case you would like to apply this credit to muliple invoices, please select multiple.
If you would like to apply the credit for an amount less than the invoice amount, you can adjust the amount allocated to that invoice by altering the amount in the last column "Allocate"
Click Save
Repeat this process until all credits have been applied appropriately.
Filter by category or method (if applicable).
Refresh the Report: After selecting your options, click "Refresh" to display the filtered transactions.
Understanding the Report Data: Each row displays information about a specific transaction, including:
Date Registered (when entered in the account)
Date/Time Added
Category
Method
Amount (charge or credit)
Customer Account Number & ID
Description
Comment
Sorting the Report: Click on column headers to sort the report by various criteria (default is by date/time added).
Navigate to Tools > Billing
Click "Summary/Statements"
Click "eBilling"
This form will generate a list of customers to send eBills to based on the query selected
You must create a query to generate a specific list of customers to send eBills to
For example, some users want to send eBills to all customers that are not selected to "Hold Bill", have a prefenece for Paperless eBills, and have an account balance as of the day the query is run.
Other users may want to send eBills to customers that have a balance as of the last day of the pervious billing cycle.
It is very important to understand the query you are using.
Using the wrong query or not understanding the query being used is the most common reason a customer is not sent an eBill that should be.
To review the criteria for an existing query, click "Manage List" at the bottom left and then select the query in question.
To create a new query, click the add button. Also see
If you do not understand the query selected, it is not generating the list of customers you want it to, or you need help building one, please reach out to Wise Option Support directly.
Select the apprpriate query > Refresh
Quickly skim the list to ensure it looks accurate
Select the customers you would like to send eBills to
Typically, this is all in the list, however, you may wish to unselect a few for various reasons
Review the From email (the email that will recieve replies if the customers respond to the eBill)
Review the email Subject Line
Select an eBilling Template
This is the email template that will send to customers selected and should include the link to their eBilling portal.
If no template is selcted, Wise Option will use the original eBilling email template that is used when starting with Wise Option
If you would like to select an email template, click "Select Template" and select the correct template from the Form Letter repository > Save
You can confirm the correct template is selected by hovering your cursor over the "Select Template" button, which will show the template selected
Click "Send eBills to Selected Customers Only"
After all emails are sent, if any could not be sent, a message will appear with reasons.
This list only shows emails that could not be sent, not ones that failed to be delivered or went to a customers spam inbox.
Printed Statements
Navigate to Tools > Billing
Click "Summary/Statements"
Click "Printed Statements"
Enter the period you would like to generate Printed Statements for
This date range is very important, as the customer will ONLY see transactions (invoices, charges, payments, credits, etc) for the period selected.
The total owed will only show the total owed as of the last day of the period selected.
This form will generate a list of customers to Print Statements for based on the query selected
You must create a query to generate a specific list of customers print statements for
For example, some users want to print statements for all customers that are not selected to "Hold Bill", have a prefenece for Paper Bills, and have an account balance as of the day the query is run.
Other users may want to print statements for customers that have a balance as of the last day of the pervious billing cycle.
Select the apprpriate query > Refresh
Quickly skim the list to ensure it looks accurate
Select the customers you would like to print statements for
Typically, this is all in the list, however, you may wish to unselect a few for various reasons
Click "Print Statements for Selected Customers Only"
Review the Statement Generation Settings
We always recommend to Preview Statements first so you can save the file to your local computer and print from there.
This will be SIGNIFICANTLY faster than printing from the Desktop Application and allow you to continue utlizing the application while statements are printed.
Click "To print statements according to your options CLICK HERE"
Once the file is generated, save the file to your local computer
Then open the file on your local computer and print.
Customer File > Account
Double-click on the charge or credit that needs to be adjusted.
If you use Credit Allocations and this credit is applied, you will not be able to edit and must un-apply the payment before editing.
After payment is unapplied, you can perform this and the following steps.
Edit the fields that need adjusting
Save
If using Credit Allocations, ensure the payment is applied appropriately.
Deleting an Entry
Customer File > Account
Highlight the record by clicking the date
Click "Cancel Event" at the bottom of the account
If you use Credit Allocations and this credit is applied, you will not be able to delete this entry and must un-apply the payment before doing so.
After payment is unapplied, you can perform this and the following steps.
Confirm
The entry has now been deleted
For visual learners or those who prefer step-by-step guidance, we offer a concise instructional video below.
Charge
Customer File > Account
Add (bottom right) > Charge
Select a Category
Enter Date
Enter the amount
Add a comment if needed
Save
Credit
Customer File > Account
Add (bottom right) > Credit
Select a Category and Method
Enter Date
For visual learners or those who prefer step-by-step guidance, we offer a concise instructional video below.
Charge
Customer File > Account
Add (bottom right) > Charge
Select a Category
Enter Date
Enter the amount
Credit
Customer File > Account
Add (bottom right) > Credit
Select a Category and Method
Enter Date
Customer File > Account
Charge (bottom left corner)
Select a Category
Enter Date
Enter the amount
Add a comment if needed
Save
If using Credit Allocations, ensure the charge is allocated appropriately.
Credit
Customer File > Account
Credit (bottom left corner)
Select a Category and Method
Enter Date
Enter the amount
Add a comment if needed
Save
If using Credit Allocations, ensure the credit is applied appropriately.
For visual learners or those who prefer step-by-step guidance, we offer a concise instructional video below.
Charge
Customer File > Account
Add (bottom right) > Charge
Select a Category
Enter Date
Enter the amount
Add a comment if needed
Save
Credit
Customer File > Account
Add (bottom right) > Credit
Select a Category and Method
Enter Date
For visual learners or those who prefer step-by-step guidance, we offer a concise instructional video below.
Charge
Customer File > Account
Add (bottom right) > Charge
Select a Category
Enter Date
Enter the amount
Credit
Customer File > Account
Add (bottom right) > Credit
Select a Category and Method
Enter Date
IMPACT
Estimated Time to Complete – 10 minutes
Before beginning, make sure you have:
Logged into your Wise Option account.
Necessary user permissions to access Commission Rule.
Click the tabs below based on the version of the Wise Option software you need instructions on.
Keep an eye on this page in the future, we will be putting details about this feature here! Our is also a great place to get answers from fellow Wise Option Users.
Online Help Request: Submit a help request or schedule a support session anytime through our website .
Email: For less urgent inquiries, reach out directly to your account manager via their email for personalized assistance. You can also email our general support team at .
Phone or Text: Dial or send a message to (214) 393-5522. Please be sure to include your name and business if this is your first time contacting us on our support line.
Don't hesitate to get in touch if you need help or wish to schedule a support session. Our team is dedicated to ensuring you have the best experience with our services.
Please help us improve our eLearning Library by submitting your .
This feature is not relevant or present on the Web App version of Wise Option.
The packages below are required in addition to the IMPACT package. If you have questions about this please contact your account manager.
IMPACT
Estimated Time to Complete – 10 minutes
Click the tabs below based on the version of the Wise Option software you need instructions on.
<Video Coming Soon!>
Procedure > Invoice Expresso > New Invoice Expresso.
This feature has hotkeys for most actions. Hover your mouse over each to learn the hotkey for that action.
Select the invoice type and review the invoice properties.
Select whether you would like to bill the owner set in the patient file or set the invoice owner for all invoices created in this Invoice Expresso round (Set for this Inv. Exp.).
Click Add Patient to add patients.
Create.
At this point, the settings are saved. If users need to close the system, they can always return and continue later by navigating to the Invoice Expresso Log and picking up where they left off.
Select the invoice(s) by checking the boxes to the left of each invoice number to which you would like to add charges.
If this is your first time using the Invoice Expresso, review the settings for default selection after charge submission.
Click the settings at the top right
Select the option that makes sense for you
Remember Last Selection - After each charge entry round, the invoices selected will stay selected
Click add charges.
Review charge properties and use data entry tools to add charges to selected invoices.
Repeat as necessary.
Users can also add more patients by clicking Add Patients.
Users can preview the invoices by clicking the Preview button.
Users can individually cancel invoices by clicking the X button at the right of each invoice or selecting multiple invoices and clicking Cancel Selected.
Users can individually edit invoices by clicking on the invoice number or the edit button at the right of each invoice.
Once complete, users can select multiple invoices and use the Close Selected button to close the invoices.
Users can then send eBills to the invoice owner(s) by clicking eBilling, which generates a list of invoice owners present in Invoice Expresso.
Users can also print statements and invoices via the Print option.
Click the tabs below based on the version of the Wise Option software you need instructions on.
<Video Coming Soon>
Open the invoice that needs an adjustment
Click "Adjust Invoice" at the top right
Confirm and click "Yes" when asked
If you use Credit Allocations and the invoice was allocated, this automatically de-allocates the invoice.
Open the invoice that needs an adjustment
Click "Adjust Invoice" at the top right
Confirm and click "Yes" when asked
If you use Credit Allocations and the invoice was allocated, this automatically de-allocates the invoice.
Go to the customer account for which the invoice is on
If using Credit Allocations, you must de-allocate the invoice first
Highlight the invoice record and click "Cancel Event."
Click Yes when asked if you'd like to open the pending invoice.
Open the invoice that needs an adjustment
Click "Adjust Invoice" at the top right
Confirm and click "Yes" when asked
If you use Credit Allocations and the invoice was allocated, this automatically de-allocates the invoice.
Before beginning, make sure you have:
The Wise Option desktop application set up on the device
Access to the desktop app via a Professional username and password
Click the tabs below based on the version of the Wise Option software you need instructions on.
For visual learners or those who prefer step-by-step guidance, we offer a concise instructional video below.
The desktop application was made to run in tabs (like an internet browser). Opening multiple windows will result in significantly reduced performance and, therefore, is not recommended.
There are a few ways to open a new tab in Wise Option:
Main menu > Select a module and form.
If you already have a form open > Right-click the menu.
When one tab is open, right-click on a first-level tab to reveal the right-click menu.
You will notice hyperlinks (blue underlined text) on many forms.
If you click on them, they will open a new tab or pop-up window depending on the form.
Example #1: if you are on the patient file and click the hyperlink “Owner”, it will open that customer file in a new tab.
Example #2: if you are adding a new patient and click "Job Purpose" a pop-up will generate for you to add/edit the list of job purposes.
Practice:
Open the patient file on the desktop application.
Open the right-click menu to open another form.
Add a form to your favorites on the right-click menu.
Go back to the patient file.
You will notice many buttons with a single letter underlined. This tells you this key is a “Hot-Key”
Hotkeys are keys that you can program for actions on your keyboard, not your mouse.
This takes practice and muscle memory, but users that utilize hotkeys are SIGNIFICANTLY faster with data entry.
Example: When on the patient file, the H in Patient History is underlined. Click and hold the Alt key on your keyboard and press the H key.
Practice:
Click Alt + P to add a new patient to the customer file.
When entering data on a form, you can move from one field to the next by clicking the Tab key on your keyboard.
Practice:
Create a new patient and use the Tab key to move through the form. Click Alt + S to save the file.
Click the tabs below based on the version of the Wise Option software you need instructions on.
For visual learners or those who prefer step-by-step guidance, we offer a concise instructional video below.
Video Coming Soon
Navigate to any form in Wise Option with a search bar (i.e. Patient Management, Home Screen, Customer management).
Click the Search Settings icon.
Review the Match option
Click the tabs below based on the version of the Wise Option software you need instructions on.
<Video Coming Soon!>
There are several locations in which this can be achieved from
From the Patient File
Navigate to a patient file
Click Billing
Review the dates in the top right corner. This searches for all unbilled miscellaneous procedures on this patient file between the date range selected
From Patient Procedure Summary
Search for the specific patient
Click Billing (bottom left)
Review the dates in the top right corner. This searches for all unbilled miscellaneous procedures on this patient file between the date range selected
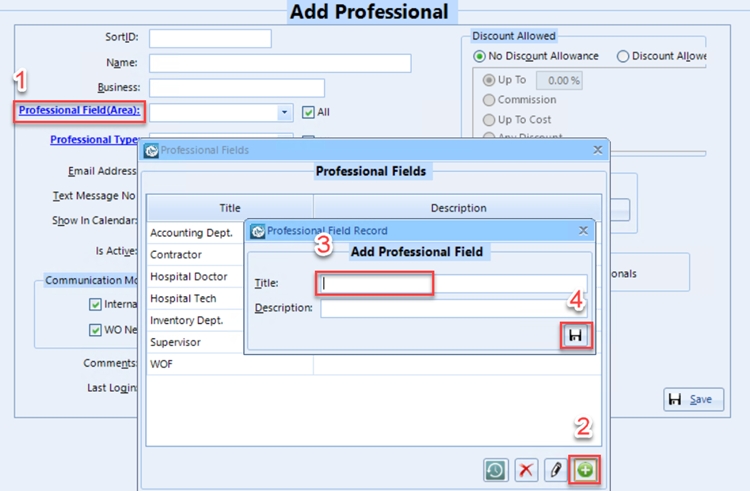
Select All - After each charge entry round, all invoices will be selected
Unselect All -After each charge entry round, all invoices will be unselected
Procedure > Invoice Expresso > New Invoice Expresso.
There are hotkeys for most actions in this feature. Hover your mouse over each to learn the hotkey for that action.
Select the invoice type and review the invoice properties.
Select whether you would like to bill the owner set in the patient file or set the invoice owner for all invoices created in this Invoice Expresso round (Set for this Inv. Exp.).
Click Add Patient to add patients.
Create.
At this point, the settings are saved. If users need to close the system, they can always return and continue later by navigating to the Invoice Expresso Log and picking up where they left off.
Select the invoice(s) by checking the boxes to the left of each invoice number to which you would like to add charges.
If this is your first time using the Invoice Expresso, review the settings for default selection after charge submission.
Click the settings at the top right
Select the option that makes sense for you
Remember Last Selection - After each charge entry round, the invoices selected will stay selected
Select All - After each charge entry round, all invoices will be selected
Unselect All -After each charge entry round, all invoices will be unselected
Click add charges.
Review charge properties and use data entry tools to add charges to selected invoices.
Repeat as necessary.
Users can also add more patients by clicking Add Patients.
Users can preview the invoices by clicking the Preview button.
Users can individually cancel invoices by clicking the X button at the right of each invoice or selecting multiple invoices and clicking Cancel Selected.
Users can individually edit invoices by clicking on the invoice number or the edit button at the right of each invoice.
Once complete, users can select multiple invoices and use the Close Selected button to close the invoices.
Procedure > Invoice Expresso > New Invoice Expresso.
Select the invoice type and review the invoice properties.
Select whether you would like to bill the owner set in the patient file or set the invoice owner for all invoices created in this Invoice Expresso round (Set for this Inv. Exp.).
Click Add Patient to add patients.
Create.
At this point, the settings are saved. If users need to close the system, they can always return and continue later by navigating to the Invoice Expresso Log and picking up where they left off.
Select the invoice(s) by checking the boxes to the left of each invoice number to which you would like to add charges.
If this is your first time using the Invoice Expresso, review the settings for default selection after charge submission.
Click the settings at the top right
Select the option that makes sense for you
Remember Last Selection - After each charge entry round, the invoices selected will stay selected
Select All - After each charge entry round, all invoices will be selected
Unselect All -After each charge entry round, all invoices will be unselected
Click add charges.
Review charge properties and use data entry tools to add charges to selected invoices.
Repeat as necessary.
Users can also add more patients by clicking Add Patients.
Users can preview the invoices by clicking the Preview button.
Users can individually cancel invoices by clicking the X button at the right of each invoice or selecting multiple invoices and clicking Cancel Selected.
Users can individually edit invoices by clicking on the invoice number or the edit button at the right of each invoice.
Once complete, users can select multiple invoices and use the Close Selected button to close the invoices.
We recommend selecting the query All Dates at all times to avoid missed charges.
Check the selection boxes next to the procedures you wish to bill
Click "Bill"
Review Invoice Properties (Invoice date, bill to, etc)
If you wish to change the owner of this invoice (which does NOT change the owner of the horse), please do so here by removing the owner
Save
Please review the Invoice and ensure it is correct. At this time, make any adjustments (additions or edits).
Click "Close Invoice"
The invoice will now be on the customer account, and the balance is ready for payment.
We recommend selecting the query All Dates at all times to avoid missed charges.
Check the selection boxes next to the procedures you wish to bill
Click "Bill"
Review Invoice Properties (Invoice date, bill to, etc)
Save
Please review the Invoice and ensure it is correct. At this time, make any adjustments (additions or edits).
Click "Close Invoice"
The invoice will now be on the customer account, and the balance is ready for payment.
It is very important to understand the query you are using.
Using the wrong query or not understanding the query being used is the most common reason a print statement was not generated for a customer that should have been.
To review the criteria for an existing query, click "Manage List" at the bottom left and then select the query in question.
To create a new query, click the add button. Also see Queries
If you do not understand the query selected, it is not generating the list of customers you want it to, or you need help building one, please reach out to Wise Option Support directly.


The invoice is now Pending and ready for adjustments. It is important to note that while an invoice is Pending, it is NOT on the customer account.
Decide what should happen with any procedures present on the invoice.
If you wish for these procedures to return as unbilled procedures on the patient file, proceed with canceling the invoice by clicking "Cancel Invoice:
If you wish for all procedures to be deleted, please click "Clear Invoice" and then "Cancel Invoice."
The invoice is now Pending and ready for adjustments. It is important to note that while an invoice is Pending, it is NOT on the customer account.
The patient has NOT been discharged yet
Decide what should happen with any procedures present on the invoice.
If you wish for these procedures to return as unbilled procedures on the inpatient record, proceed with canceling the invoice by clicking "Cancel Invoice:
If you wish for all procedures to be deleted, please click "Clear Invoice" and then "Cancel Invoice."
The patient has been discharged
By canceling the final invoice for an inpatient record, the record will automatically return to Unbilled HR Records.
If this inpatient record was made in error, please edit the invoice instead, change its ownership to a test customer, and close the invoice.
Click "Cancel Invoice"
Please note that this does not edit the frozen record in inventory. If the embryo or semen should not be charged in the future, please go to that record and adjust accordingly.
The invoice is now Pending and ready for adjustments. It is important to note that while an invoice is Pending, it is NOT on the customer account.
Click "Cancel Invoice"
Phone or Text: Dial or send a message to (214) 393-5522. Please be sure to include your name and business if this is your first time contacting us on our support line.
Don't hesitate to get in touch if you need help or wish to schedule a support session. Our team is dedicated to ensuring you have the best experience with our services.
Please help us improve our eLearning Library by submitting your feedback here.
Match is a setting which forces the search to include only results that include all words provided and in that order typed.
When unselected, Wise Option will search for any results that include at least one word from those typed.
Example with Match:
Text Typed: Shes Really Fast
Possible results: Shes Really Fast, Shes Really Fast Too, Wow Shes Really Fast
Example without Match:
Text Typed: Shes Really Fast
Possible Results: Shes Gonna Fly, Really Going Fast, Not Really Fast, Shes Really Fast
In general, having the Match option selected will provide a more narrowed search with less results
Review searchable fields & select
Each form will have a list of fields in which the search bar can look through
Users can select multiple fields
For example, when searching for patients, you may want to search Name, nickname, and registration number.
Please keep in mind, that have more fields selected may impact search performance
Review Active option
On some forms that you are search customers or patients, you will have the option to select Active.
If this option is selected, it will ONLY result active customer and or patient files
Save.
Remeber that search settings are saved on a per-form and per-user basis
Phone or Text: Dial or send a message to (214) 393-5522. Please be sure to include your name and business if this is your first time contacting us on our support line.
Don't hesitate to get in touch if you need help or wish to schedule a support session. Our team is dedicated to ensuring you have the best experience with our services.
Please help us improve our eLearning Library by submitting your feedback here.

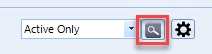
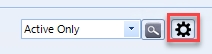

Add a comment if needed
Save
Add a comment if needed
Save
Add a comment if needed
Save
Add a comment if needed
Save
Add a comment if needed
Save
Add a comment if needed
Save
Select "Location Management" from the menu.
Use the refresh button if needed, located at the top left.
Utilize the expand/collapse feature for icons to manage your view.
Explore the filter options by clicking on the filter icon.
Sort the view by priority or location based on your preference.
Further filter by selecting options such as all active patients, checked reminders, unchecked reminders, and trial patients.
Optionally, filter by priority or location to refine your view.
Review the summary at the top, indicating the number of locations and patients for each priority level.
Expand all levels to view detailed information about mares listed under each priority.
Click and hold to open the patient file directly from the list.
Use the filter settings to streamline your workflow, for example, selecting "Palpation not checked only."
As you progress through daily tasks, the list will update automatically, providing an accurate overview of pending actions.
Note that changing locations will be available in the next application version
On a Mac, please click here to review right-click (secondary click) options.
You can select Main Menu and navigate to any form.
You can also flag certain forms as favorites by selecting “Add to Favorites”.
Click on the owner in the file to open the customer file in a new tab.
Click on the Account # in the top right corner to open the customer account.
Close the customer account, but not the customer file.
If you accidentally close the customer file, go back to step 4.
A good place to practice: the Save button on every form is Alt + S.
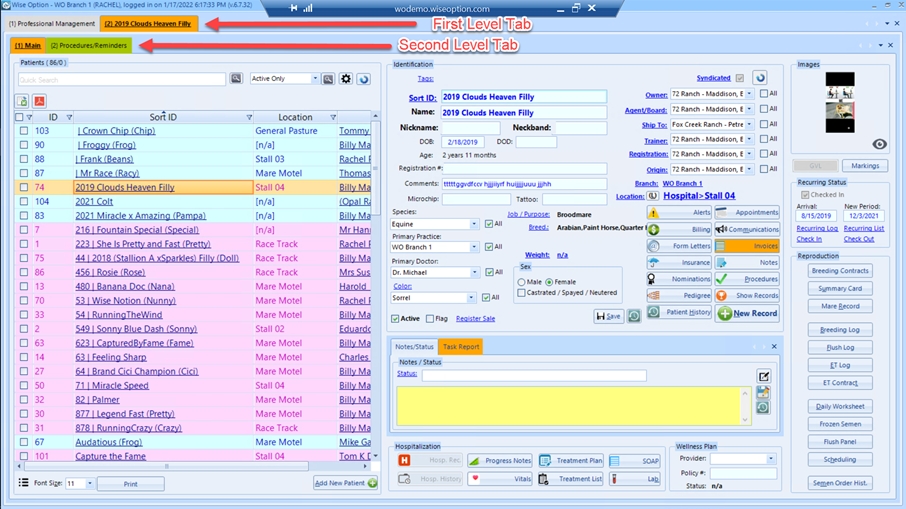
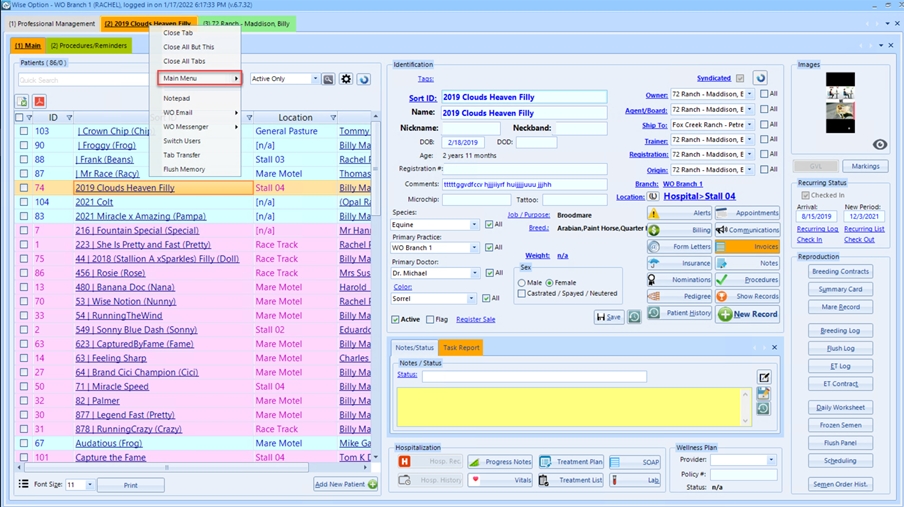
Open the invoice that needs an adjustment
Click "Adjust Invoice" at the top right
Confirm and click "Yes" when asked
If you use Credit Allocations and the invoice has been allocated, this process will automatically de-allocate the invoice. Please ensure it is allocated correctly after closing the invoice when completing the steps below.
The invoice is now Pending and ready for adjustments. It is important to note that while an invoice is Pending, it is NOT on the customer account.
Some Common Adjustments:
Changing or Adjusting the invoice owner:
Click "Edit Invoice Properties"
To edit the percentage a customer owes on the invoice:
Save & Close the invoice
Review the invoice
Click Close Invoice
If using credit allocations, ensure the invoice is applied to the appropriate payment if present.
Go to the customer account for which the invoice was billed to
If you utilize Credit Allocations, you must deallocate the invoice before proceeding. Please reallocate the invoice once the steps below are complete
Highlight the invoice record by clicking on a non-hyperlink value (i.e. date)
Click "Cancel Event" at the bottom of the form
Confirm and click "Yes" when asked if you would like to open the pending invoice
The invoice is now Pending and ready for adjustments. It is important to note that while an invoice is Pending, it is NOT on the customer account.
Adjustments:
Changing or Adjusting the invoice owner:
Click "Edit Invoice Properties"
To edit the percentage a customer owes on the invoice:
Save & Close the invoice
Review the invoice > Click Save
Click Close Invoice
If using credit allocations, please re-apply the credit to the invoice if applicable.
<Video Coming Soon>
Open the invoice that needs an adjustment
Click "Adjust Invoice" at the top right
Confirm and click "Yes" when asked
If you use Credit Allocations and the invoice has been allocated, this process will automatically de-allocate the invoice. Please ensure it is allocated correctly after closing the invoice when completing the steps below.
At this time, it is not possible to edit a frozen storage invoice from the web app.
<Video Coming Soon>
Open the invoice that needs an adjustment
Click "Adjust Invoice" at the top right
Confirm and click "Yes" when asked
If you use Credit Allocations and the invoice has been allocated, this process will automatically de-allocate the invoice. Please ensure it is allocated correctly after closing the invoice when completing the steps below.
At this time, it is not possible to edit a frozen storage invoice from the mobile app.
In this tutorial, we will review the general procedures for end-of-month billing. It is not intended as a how-to but to serve as a general user guideline and a point of reference.
It is important to note that individual facilities may have different end-of-month procedures, so we always recommend contacting your administrator to ensure that the proper protocols and procedures are followed.
We recommend that a facility write its own end-of-month billing protocols. The one below can be used as a guide, and if you have any questions, please don't hesitate to contact your account manager.
Estimated Time to Complete – 30 minutes
Click the percentage they currently owe > click edit (pencil icon)
Enter the appropriate percentage > Save
Repeat as needed for any other owners
To change the owner of the invoice:
Click the percentage they currently owe > click delete (X icon)
This will remove that customer from the invoice
Search for the new owner > click add (+ icon)
Enter the percentage they own of the invoice
Repeat as needed for any other owners
Save
Please note that adjusting the ownership here ONLY changes it for this invoice.
If the patient's ownership needs to be changed for future records, please go to the patient file and change the ownership there.
Please note it is NOT possible to edit the ownership of an OTC or Herd Work Invoice
Changing the Invoice Date:
Click "Edit Invoice Properties"
Change Date
Save
Please note: This only changes the Invoice Date, not the date of any procedures present in the invoice.
Remove an item
Click the red "X" at the end of the appropriate record
Changing the unit price of an item
Click the unit price of the item in the grid to update
Changing Prescribed By and/or Performed By
Click the pencil icon at the end of the procedure
Change the Prescribed By and or Performed By
Click Save
Repeat as needed on other items
Changing the Invoice Doctor:
Click "Edit Invoice Properties"
Change Invoice Doctor
Save
Please note: This only changes the Invoice Doctor, not prescribed by or performed by of any of the procedures present in the invoice.
Click the percentage they currently owe > click edit (pencil icon)
Enter the appropriate percentage > Save
Repeat as needed for any other owners
To change the owner of the invoice:
Click the percentage they currently owe > click delete (X icon)
This will remove that customer from the invoice
Search for the new owner > click add (+ icon)
Enter the percentage they own of the invoice
Repeat as needed for any other owners
Save
Please note that adjusting the ownership here ONLY changes it for this invoice.
If future storage of the semen or embryo needs to be adjusted, this must be done through the Frozen Semen or Vitrified Embryo inventory
Remove an embryo or frozen semen record from the invoice:
Click the red "X" at the end of the appropriate record
Please note that adjusting the records here ONLY changes it for this invoice and does NOT automatcally change the invoice amount.
If future storage of the semen or embryo needs to be adjusted, this must be done through the Frozen Semen or Vitrified Embryo inventory
Adjusting the invoice total
Adjust the subtotal field at the bottom right
Click Save
Please note that adjusting the records here ONLY changes it for this invoice.
If future storage of the semen or embryo rates needs to be adjusted, this must be done through the Frozen Semen or Vitrified Embryo inventory
The invoice is now Pending and ready for adjustments. It is important to note that while an invoice is Pending, it is NOT on the customer account.
Some Common Adjustments:
Changing or Adjusting the invoice owner:
Click "Edit Invoice Properties"
To edit the percentage a customer owes on the invoice:
Click the percentage they currently owe > click edit (pencil icon)
Enter the appropriate percentage > Save
Repeat as needed for any other owners
To change the owner of the invoice:
Click the percentage they currently owe > click delete (X icon)
This will remove that customer from the invoice
Search for the new owner > click add (+ icon)
Save
Please note that adjusting the ownership here ONLY changes it for this invoice.
If the patient's ownership needs to be changed for future records, please go to the patient file and change the ownership there.
Please note it is NOT possible to edit the ownership of an OTC or Herd Work Invoice
Changing the Invoice Date:
Click "Edit Invoice Properties"
Change Date
Save
Remove an item
Click the red "X" at the end of the appropriate record
Changing the unit price of an item
Click the unit price of the item in the grid to update
Changing Prescribed By and/or Performed By
Click the pencil icon at the end of the procedure
Change the Prescribed By and or Performed By
Click Save
Changing the Invoice Doctor:
Click "Edit Invoice Properties"
Change Invoice Doctor
Save
Save & Close the invoice
Review the invoice
Click Close Invoice
If there are pending invoices, please review and close
Ensure All Credits have been Allocated - if using Credit Allocation
Reports > Events Pending Allocation
Run for all dates and select credits
Ensure there are no credits that can be allocated
Recurring Module
If using the recurring module, you'll want to charge all records
Navigate to Tools >Billing > Recurring Task Charge
Ensure all records are up to date as of the last date of the billing cycle
Click charge at the bottom right corner.
Ensure dates and groups charged to align with your billing protocols > Submit
Verify that all payments have been posted
Verify that all Miscellaneous procedures have been entered
Review of Miscellaneous procedures
We always recommend some review of Miscellaneous unbilled procedures before billing and mass invoice creation
This may be different for different operations.
We recommend using the Unbilled Procedure Review under Tools> Billing. However, your facility may have another preference.
Fix any unbilled entries that are incorrect or missing
Charge Service Fees (Finance Charges) - if applicable
Not every facility charges these interest-based late fees.
Tools > Billing > Charge Service Fees
Review options and charge
Bill Procedures (Massive Invoice Creation)
Tools > Billing > Bill Procedures
Review the date range to be considered for unbilled procedures
Review the invoice date
Review the options for procedures to bill
Submit to create invoices
Automated Charges
You may use this feature if you use PCI-compliant credit card integration.
Some facilities will process these autopay customers at this step, while others wait until after they send eBills. This largely depends on your query for generating statements and whether you send eBills or printed statements.
We do not recommend waiting until after statement generation to process the auto-pay customers if you print statements for customers on autopay, as those customers on autopay will not have the correct balance on their paper statement.
Review and Send Statements
Tools > Billing > Summary/Statements
Select eBill or Print (depending on if you print statements or send eBills. Of course, if you do both, please do one first, then the other).
Adjust (edit) Queries if needed - This step is incredibly important to ensuring all statements are sent out that need to be. If you are unsure if you need to do this, please contact Wise Option Support.
Select the appropriate Query
Select and Send / Print
Run monthly financial reports
Ensure All Credits have been Allocated - if using Credit Allocation
Reports > Events Pending Allocation
Run for all dates and select credits
Ensure there are no credits that can be allocated
Recurring Module
If using the recurring module, you'll want to charge all records
Navigate to Tools >Billing > Recurring Task Charge
Ensure all records are up to date as of the last date of the billing cycle
Click charge at the bottom right corner.
Ensure dates and groups charged to align with your billing protocols > Submit
Verify that all payments have been posted
Verify that all Miscellaneous procedures have been entered
Review of Miscellaneous procedures
We always recommend some review of Miscellaneous unbilled procedures before billing and mass invoice creation
This may be different for different operations.
We recommend using the Unbilled Procedure Review under Tools> Billing. However, your facility may have another preference.
Fix any unbilled entries that are incorrect or missing
Charge Service Fees (Finance Charges) - if applicable
Not every facility charges these interest-based late fees.
Tools > Billing > Charge Service Fees
Review options and charge
Bill Frozen Storage (Frozen Semen & Vitrified Embryos) - if applicable
Tools > Billing > Charge Frozen Storage
Ensure all frozen records are up to date (I.e. all shipping, breeding, or adjustments)
Check dates and options > charge
Bill Procedures (Massive Invoice Creation)
Tools > Billing > Bill Procedures
Review the date range to be considered for unbilled procedures
Review the invoice date
Review the options for procedures to bill
Submit to create invoices
Automated Charges
You may use this feature if you use PCI-compliant credit card integration.
Some facilities will process these autopay customers at this step, while others wait until after they send eBills. This largely depends on your query for generating statements and whether you send eBills or printed statements.
We do not recommend waiting until after statement generation to process the auto-pay customers if you print statements for customers on autopay, as those customers on autopay will not have the correct balance on their paper statement.
Review and Send Statements
Tools > Billing > Summary/Statements
Select eBill or Print (depending on if you print statements or send eBills. Of course, if you do both, please do one first, then the other).
Adjust (edit) Queries if needed - This step is incredibly important to ensuring all statements are sent out that need to be. If you are unsure if you need to do this, please contact Wise Option Support.
Select the appropriate Query
Select and Send / Print
Run monthly financial reports
If there are pending invoices, please review and close
Ensure All Unbilled Hospital Records are closed
If the Hospital Icon on the home screen is red, this is an indicator that there are Unbilled Hospital Records.
We recommend closing them and creating the final invoice before proceeding.
Ensure All Credits have been Allocated - if using Credit Allocation
Reports > Events Pending Allocation
Run for all dates and select credits
Ensure there are no credits that can be allocated
Recurring Module - if applicable
If using the recurring module, you'll want to charge all records
Navigate to Tools >Billing > Recurring Task Charge
Ensure all records are up to date as of the last date of the billing cycle
Click charge at the bottom right corner.
Ensure dates and groups charged to align with your billing protocols > Submit
Verify that all payments have been posted
Verify that all Miscellaneous procedures have been entered
Review of Miscellaneous procedures
We always recommend some review of Miscellaneous unbilled procedures before billing and mass invoice creation
This may be different for different operations.
We recommend using the Unbilled Procedure Review under Tools> Billing. However, your facility may have another preference.
Fix any unbilled entries that are incorrect or missing
Charge Service Fees (Finance Charges) - if applicable
Not every facility charges these interest-based late fees.
Tools > Billing > Charge Service Fees
Review options and charge
Bill Frozen Storage (Frozen Semen & Vitrified Embryos) - if applicable
Tools > Billing > Charge Frozen Storage
Ensure all frozen records are up to date (i.e. all shipping, breeding, or adjustments)
Check dates and options > charge
Bill Procedures (Massive Invoice Creation)
Tools > Billing > Bill Procedures
Review the date range to be considered for unbilled procedures.
Review the invoice date.
Review the options for procedures to bill
Submit to create invoices
Automated Charges - if applicable
You may use this feature if you use PCI-compliant credit card integration.
Some facilities will process these autopay customers at this step, while others wait until after they send eBills. This largely depends on your query for generating statements and whether you send eBills or printed statements.
We do not recommend waiting until after statement generation to process the auto-pay customers if you print statements for customers on autopay, as those customers on autopay will not have the correct balance on their paper statement.
Review and Send Statements
Tools > Billing > Summary/Statements
Select eBill or Print (depending on if you print statements or send eBills. Of course, if you do both, please do one first, then the other).
Adjust (edit) Queries if needed - This step is incredibly important to ensuring all statements are sent out that need to be. If you are unsure if you need to do this, please contact Wise Option Support.
Select the appropriate Query
Select and Send / Print
Run monthly financial reports
If there are pending invoices, please review and close
Ensure All Credits have been Allocated - if using Credit Allocation
Reports > Events Pending Allocation
Run for all dates and select credits
Ensure there are no credits that can be allocated
Recurring Module -if applicable
If using the recurring module, you'll want to charge all records
Navigate to Tools >Billing > Recurring Task Charge
Ensure all records are up to date as of the last date of the billing cycle
Click charge at the bottom right corner.
Ensure dates and groups charged to align with your billing protocols > Submit
Verify that all payments have been posted
Verify that all Miscellaneous procedures have been entered
Review of Miscellaneous procedures
We always recommend some review of Miscellaneous unbilled procedures before billing and mass invoice creation
This may be different for different operations.
We recommend using the Invoice Simulation Report. Reports > Invoice Simulation Report
Fix any unbilled entries that are incorrect or missing
Trainer Review - Option 1
Some facilities will send trainers their invoices to review before sending them out.
At this stage, you may use the Invoice Simulation Report.
Fix any entries that may be incorrect
Charge Service Fees (Finance Charges) - if applicable
Not every facility charges these interest-based late fees.
Tools > Billing > Charge Service Fees
Review options and charge
Bill Procedures (Massive Invoice Creation)
Tools > Billing > Bill Procedures
Review the date range to be considered for unbilled procedures
Review the invoice date
Review the options for procedures to bill
Submit to create invoices
Trainer Review - Option 2
Some facilities may wait until invoices are created and closed before sending them for trainer review.
At this stage, if you wish to use a paper option, you can use the Invoice Simulation Report or the Invoice by Custom Field Report.
If you wish to send trainers a digital way to review, you can email them their Trainer URL.
Trainer Review - Option 3 (Invoice Approval)
Some facilities prefer not to wait until all trainers have approved their invoices to send statements and would like to send statements with all invoices approved for the period.
In this case, your account manager would have helped you set up a statement query that would only generate a list of customers with all their invoices for the period approved.
You may manually approve invoices via the Invoice By Custom Field Report or have trainers approve online.
Automated Charges
You may use this feature if you use PCI-compliant credit card integration.
Some facilities will process these autopay customers at this step, while others wait until after they send eBills. This largely depends on your query for generating statements and whether you send eBills or printed statements.
We do not recommend waiting until after statement generation to process the auto-pay customers if you print statements for customers on autopay, as those customers on autopay will not have the correct balance on their paper statement.
Review and Send Statements
If using Invoice Approval (Option 3):
You will likely need to generate these lists for multiple days, and trainers approve invoices.
Please ensure that ALL invoices are approved at the end
Invoice by Custom Field > All Dates > All Trainers > there should be NO Not Approved or Approval Pending Invoices)
Those customer statements may not have been generated if there are unapproved invoices.
We always recommend using the Customer Statement Audit Report periodically to ensure everyone has received an eBill or a paper statement.
Tools > Billing Summary/Statements
Select eBill or Print (depending on if you print statements or send eBills. Of course, if you do both, please do one first, then the other).
Adjust (edit) Queries if needed - This step is incredibly important to ensuring all statements are sent out that need to be. If you are unsure if you need to do this, please contact Wise Option Support.
Select the appropriate Query
Run monthly financial reports
Enter the percentage they own of the invoice
Repeat as needed for any other owners
Repeat as needed on other items
Enter the percentage they own of the invoice
Repeat as needed for any other owners
Repeat as needed on other items
Select and Send / Print
